


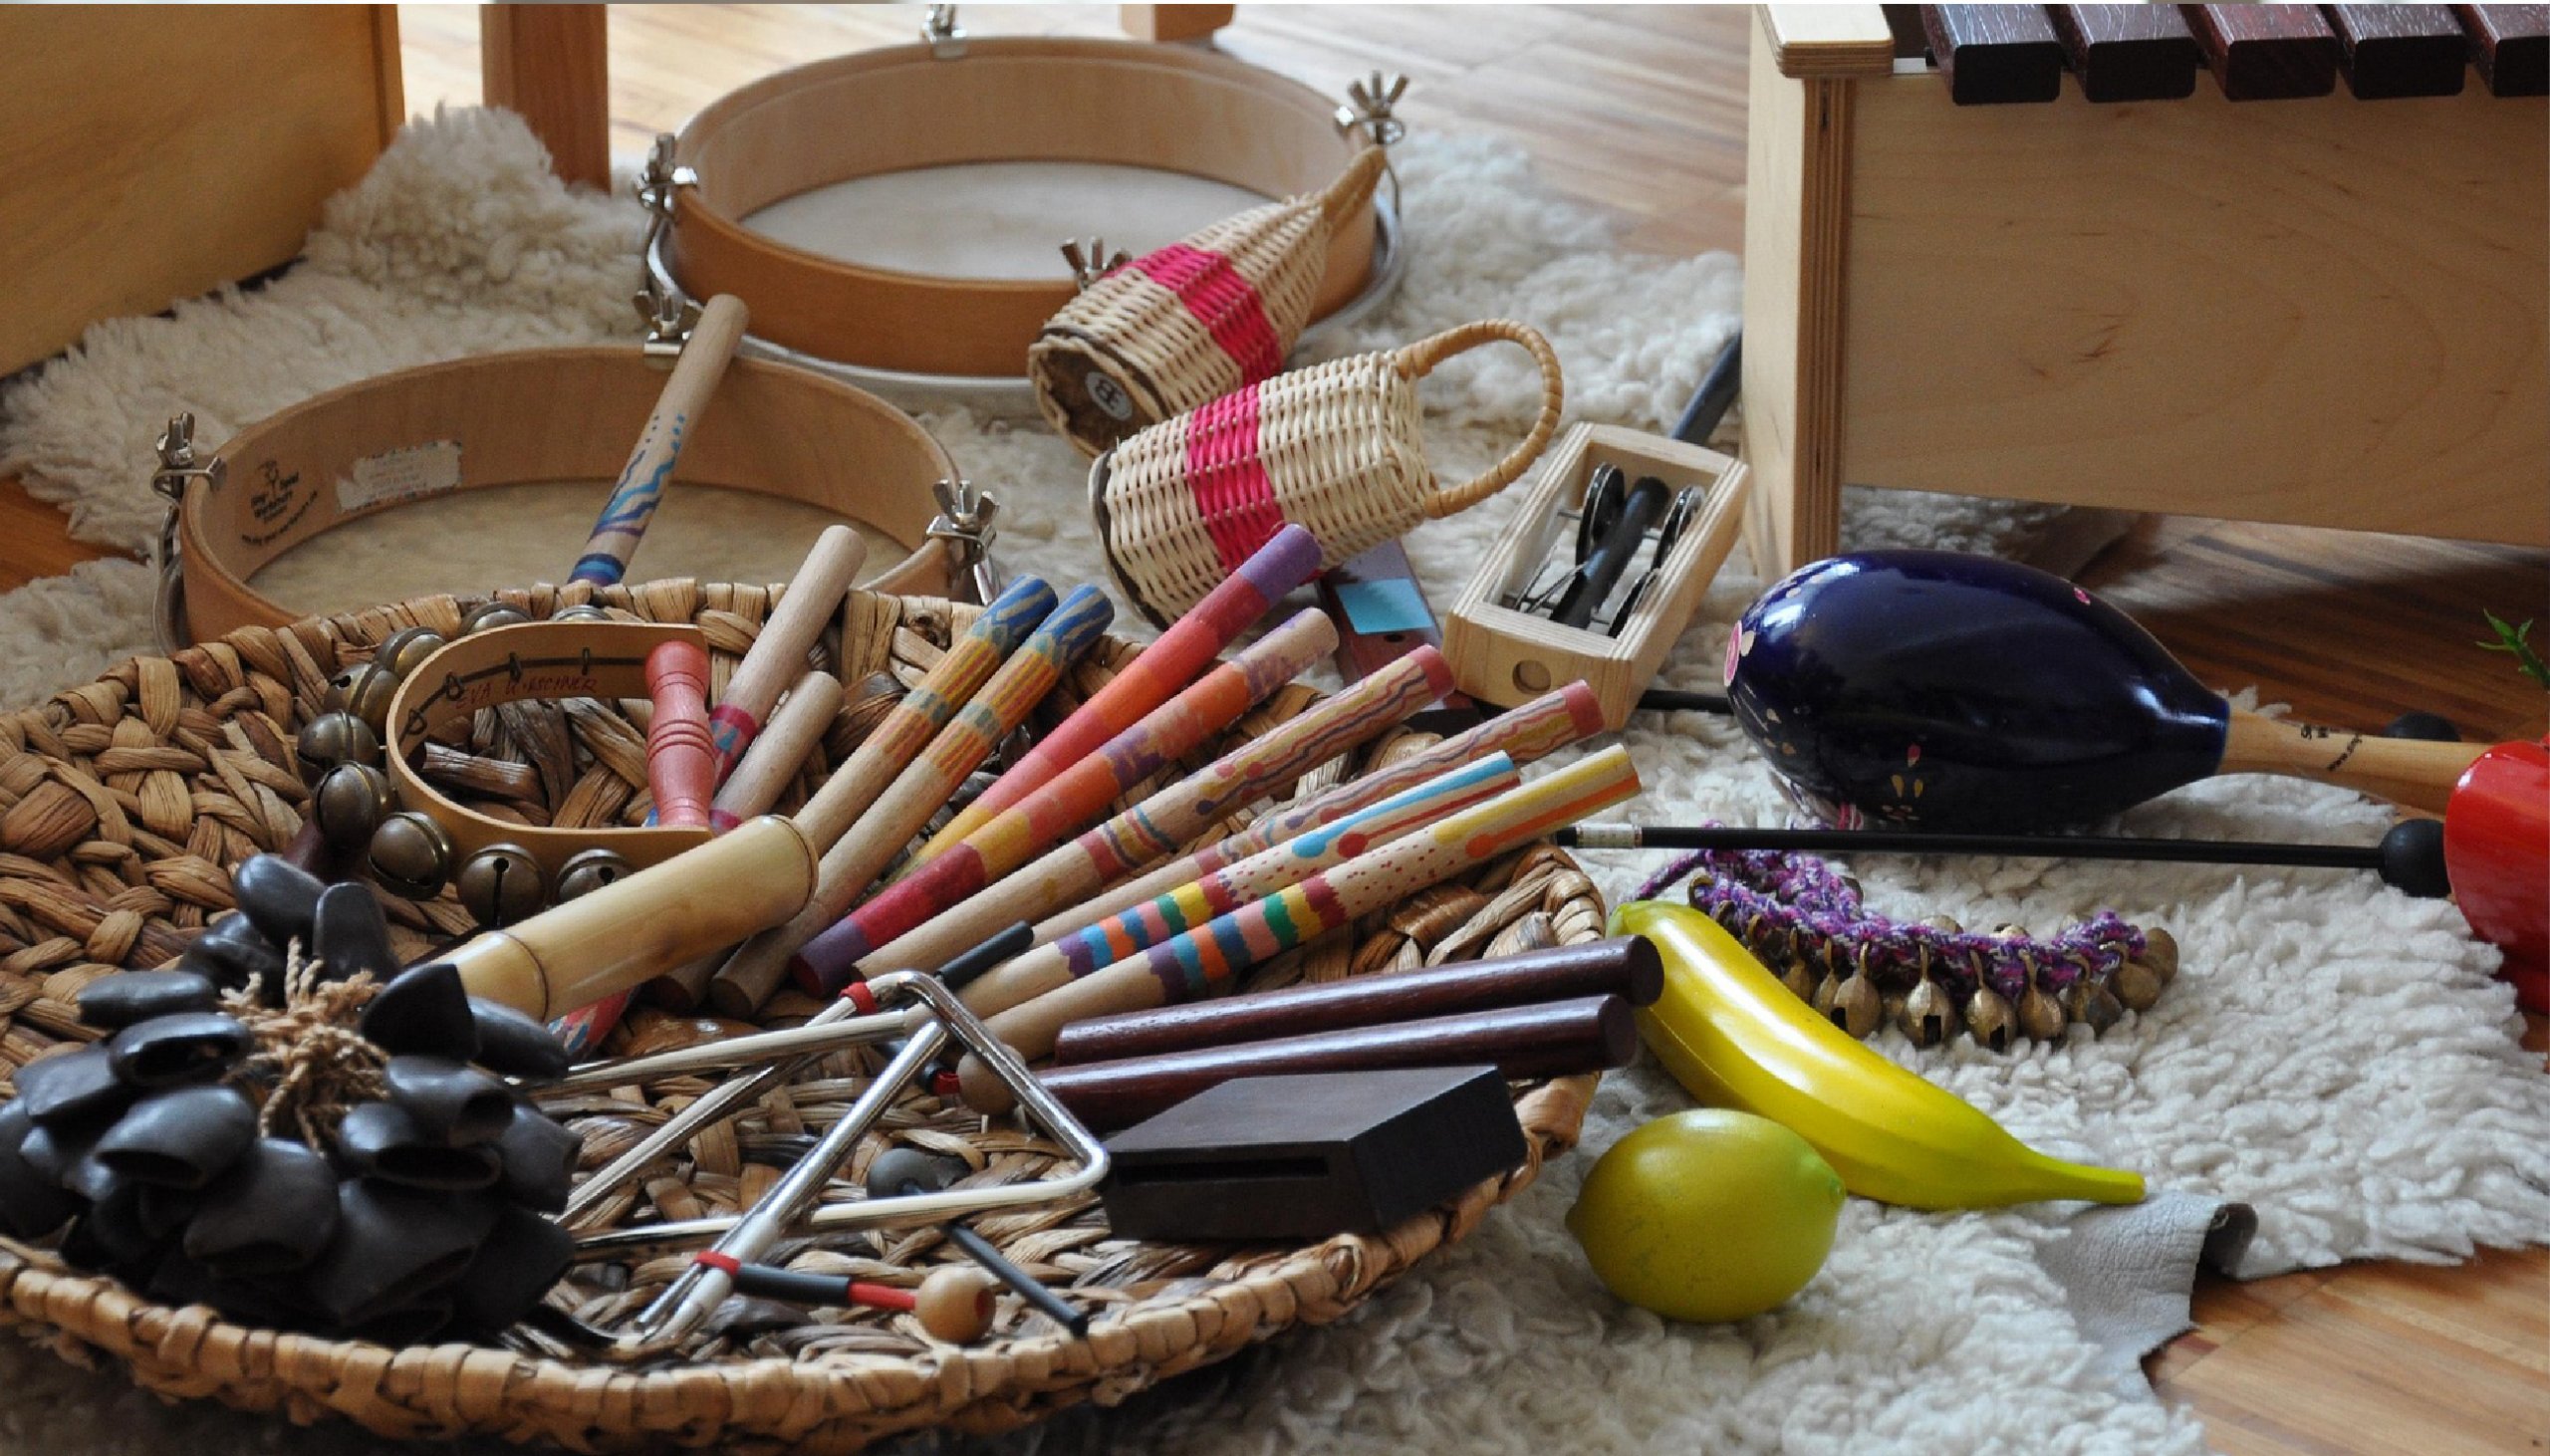


Price Comparison: Top Baby Music Classes in Singapore
If you’ve ever tried to compare baby music classes in Singapore, you already know how quickly things get confusing. Prices vary widely, class structures differ, and every school seems to promise remarkable developmental benefits. As a parent, you want to make a smart decision — one that genuinely supports your child’s growth without paying a premium for something that doesn’t deliver.
This guide cuts through the noise. We’ve compiled an honest, up-to-date price comparison of the top baby and toddler music enrichment programs in Singapore for 2026, along with a breakdown of what each type of program actually offers. Whether your little one is a newborn discovering sound for the first time or a curious two-year-old ready to move and groove, you’ll find the information you need to make a confident, well-informed choice.
Why Baby Music Classes Are Worth the Investment
Music enrichment for babies and toddlers isn’t simply about singing nursery rhymes — it’s one of the most research-backed tools available for early cognitive development. Exposure to rhythm, melody, and movement in the earliest years stimulates multiple areas of the brain simultaneously, supporting language acquisition, motor coordination, memory formation, and emotional regulation. Neuroscientists have consistently found that musical experiences in infancy create neural pathways that benefit children well beyond the music classroom itself.
In Singapore’s competitive early childhood landscape, parents are right to think carefully about enrichment choices. The key isn’t spending the most — it’s finding a program that aligns with your child’s developmental stage, keeps them genuinely engaged, and is grounded in evidence rather than entertainment alone. When those elements come together, the value is undeniable.
What Affects the Price of Baby Music Classes in Singapore
Before diving into specific figures, it helps to understand why prices differ so significantly across providers. Several factors drive the cost of baby music enrichment programs in Singapore:
- Class size: Smaller group sizes allow for more personalised attention and typically command higher fees. Some programs offer semi-private or trial classes at different price points.
- Curriculum depth: Programs built on proprietary, developmentally sequenced curricula — with original music, themed learning, and milestone tracking — generally cost more than recreational sing-along sessions.
- Instructor qualifications: Teachers trained in early childhood development and music education bring more to a session than general music instructors, and this expertise is reflected in pricing.
- Location and facilities: Classes held in premium districts or purpose-built sensory learning spaces factor into overhead costs.
- Program duration and frequency: Monthly fees depend heavily on whether classes run weekly or fortnightly, and whether each session is 30, 45, or 60 minutes long.
- Age-specific programming: Well-designed schools segment their programs by developmental stage rather than offering one-size-fits-all sessions, which requires more resources to develop and deliver.
Understanding these variables helps you evaluate price against actual value — a critical distinction when comparing very different offerings side by side.
2026 Price Comparison: Top Baby Music Classes in Singapore
The following table provides a general overview of typical pricing ranges for well-known baby and toddler music enrichment providers in Singapore in 2026. Note that prices can vary based on class frequency, location, and any promotional packages on offer. Always confirm directly with the provider for the most current rates.
| Provider | Age Range | Approx. Monthly Fee (SGD) | Class Format |
|---|---|---|---|
| The Music Scientist | 4 – 47 months | ~$120 – $180 | Small group, developmental curriculum, music + movement + sensory play |
| Kindermusik | 0 – 7 years | ~$130 – $200 | Group classes, licensed international curriculum, take-home materials |
| Music for Aardvarks | 0 – 4 years | ~$140 – $190 | Group classes, original songs, parent-child participation |
| Julia Gabriel Centre | 3 months – 6 years | ~$180 – $260 | Speech, drama, and music integration; premium positioning |
| My Gym Singapore | 6 weeks – 10 years | ~$150 – $220 (membership) | Movement and music elements within broader gym programme |
It’s worth noting that some providers charge per term rather than monthly, and introductory trial class rates are often available. The Music Scientist, for instance, structures its fees to reflect the depth and developmental specificity of each age-appropriate programme — making it one of the most targeted and cost-effective choices for families with babies and toddlers specifically.
The Music Scientist: Developmental Music Classes by Age Group
What sets The Music Scientist apart in Singapore’s crowded enrichment market is the precision with which its programmes are designed around developmental milestones. Rather than offering a single format for all young children, every programme is calibrated to a specific age window — because a four-month-old and a two-year-old learn in profoundly different ways. Here’s a closer look at the programmes on offer:
Tenderfeet (4 – 18 Months)
Designed for the youngest participants, Tenderfeet introduces infants to music, movement, and sensory stimulation in a nurturing, low-pressure environment. Classes focus on auditory development, visual tracking, and early bonding between parent and child through musical interaction. This is the ideal starting point for families wanting to begin music-based development from the earliest possible stage.
Happyfeet (18 – 24 Months)
As toddlers begin to assert independence and communicate more actively, Happyfeet channels that energy into structured musical exploration. Sessions incorporate songs, rhythmic play, and movement activities that support vocabulary growth, coordination, and early social development. It’s an especially popular programme for parents of children who are always on the move.
Groovers (25 – 36 Months)
For toddlers who are becoming more expressive and curious, Groovers combines music and dance in a format that actively builds confidence alongside cognitive skills. Children in this age group respond strongly to rhythm and repetition, and the Groovers curriculum leverages those tendencies to strengthen memory, focus, and physical coordination.
Scouts (37 – 47 Months)
The Scouts programme introduces early science concepts through catchy, originally composed songs — a creative approach that makes abstract ideas memorable and genuinely fun. At this stage, children are approaching preschool readiness, and Scouts supports the cognitive foundations they’ll need for structured learning environments.
SMART-START: Preschool Readiness Programmes
For families preparing children for the transition into formal education, The Music Scientist offers dedicated preschool readiness tracks in both English and Chinese. The SMART-START programmes use music as the primary learning vehicle to develop early literacy, numeracy awareness, and the self-regulation skills that children need to thrive in kindergarten and beyond.
What to Look for Beyond the Price Tag
Price is an important factor, but it’s rarely the most important one when evaluating baby music classes. Here are the questions worth asking before enrolling your child in any programme:
- Is the curriculum developmentally sequenced? Look for programmes that change and evolve as your child grows, rather than offering the same content across a wide age range.
- Are instructors qualified in early childhood development? Music training alone isn’t enough. Educators who understand child psychology and developmental milestones deliver substantially richer learning experiences.
- Does the class structure support parental involvement? For children under two especially, parent-child participation is a key driver of learning outcomes. Classes that exclude caregivers miss an important opportunity.
- Is the music original and purposeful? Generic nursery rhymes have their place, but programmes that compose music around specific developmental goals — cognitive, linguistic, physical — offer measurably more educational value.
- Is there a clear learning progression? The best programmes feel like a journey with a destination. Each class should build on the last, and parents should be able to see their child’s development over time.
These criteria, taken together, shift the conversation from cost to value — which is precisely where it should be when your child’s development is at stake.
How to Choose the Right Music Class for Your Baby
Start with your child’s current developmental stage, not their age alone. Two 18-month-olds can be at very different stages of motor development, language acquisition, and social readiness — so look for providers who assess fit carefully rather than simply sorting by birth month. A trial class, where available, is invaluable for seeing how your child responds to the environment, the instructor, and the other children in the group.
Consider also the practical logistics: location relative to home or childcare, class timing, and whether the schedule is flexible enough to accommodate your family’s routine. Consistency matters enormously in early childhood learning — a slightly less-expensive class your child attends every week will almost always outperform a premium programme attended sporadically. The best choice is one you can actually commit to.
Finally, trust your instincts as a parent. If a class environment feels rushed, impersonal, or more focused on entertainment than genuine learning, those observations are worth taking seriously. The right baby music class should feel warm, purposeful, and grounded — and you’ll often sense that within the first session.
Frequently Asked Questions
At what age should I start my baby in music classes?
Many developmental experts suggest that musical exposure can begin from birth, as infants are already highly sensitive to rhythm and melody. Structured enrichment classes that incorporate parent-child participation, such as The Music Scientist’s Tenderfeet programme, are designed for babies as young as four months. The earlier you begin, the more neural pathways you help establish during the critical early years of brain development.
How many classes per month are typical for baby music programmes?
Most providers in Singapore offer weekly classes, which typically translates to four sessions per month. Some programmes run on a fortnightly basis, particularly for younger infants. Weekly attendance tends to produce better developmental outcomes because repetition and routine are central to how babies and toddlers consolidate learning.
Are baby music classes in Singapore eligible for any subsidies or grants?
As of 2026, private enrichment classes are generally not covered under Singapore government subsidies such as the Child Development Account (CDA), which is intended for approved childcare and early intervention services. However, it’s worth checking with individual providers and reviewing the latest guidelines from the Early Childhood Development Agency (ECDA), as policies do evolve.
Do I need to stay in class with my baby?
For children under approximately 18 months, parental participation is not just encouraged — it’s typically required and is actively built into the curriculum. Parent-child bonding through music is itself a developmental tool, and the best programmes treat caregivers as active co-learners rather than passive observers. From around age two onwards, some children begin to transition to independent class settings, depending on their individual readiness.
Making the Right Call for Your Child
Choosing a baby music class in Singapore in 2026 comes down to more than comparing monthly fees. The most valuable programmes combine developmental expertise, purposeful curriculum design, qualified instructors, and an age-specific approach that grows alongside your child. Price is a useful filter, but the real question is whether a programme will genuinely support the milestones that matter most during your child’s earliest years.
The Music Scientist has been built around exactly that philosophy — using originally composed music, sensory play, and movement to nurture young minds from as early as four months through to preschool readiness. With distinct programmes for every developmental stage and bilingual options available, it’s a thoughtfully designed choice for Singapore families who want enrichment that truly enriches.
Ready to Find the Perfect Class for Your Little One?
Every child is different, and finding the right fit starts with a conversation. Get in touch with The Music Scientist to learn more about our age-specific programmes, current pricing, and available trial class options.
Every parent who has tried to get a young child to sit down and practice music knows the struggle is real. One minute they’re eager to bang on the keys or strum a chord, and the next, they’ve wandered off in search of a snack or a toy. Keeping young learners consistently engaged with music practice is one of the most common challenges families face — and a printable music sticker chart might just be the simple, joyful solution you’ve been looking for.
Sticker charts have long been a trusted tool in early childhood education, and when applied specifically to music practice, they transform routine into celebration. Instead of nagging, you’re rewarding. Instead of frustration, you’re building excitement. This article walks you through everything you need to know about using a music practice sticker chart with your child — from understanding why it works developmentally, to designing one at home, to making it a meaningful part of your family’s musical journey.
Why Tracking Music Practice Matters for Young Children
Young children, particularly those between the ages of 3 and 7, are still developing the cognitive tools needed to understand abstract concepts like progress and improvement. When a child sits down to practice a song, they often can’t see how today’s effort connects to playing it perfectly next week. This is where visual tracking becomes incredibly powerful. A sticker chart makes the invisible visible — each sticker is a tangible, colourful reminder that they showed up and did the work.
Research in early childhood development consistently shows that young learners respond strongly to immediate, concrete rewards rather than delayed gratification. A sticker earned right after practice satisfies this developmental need beautifully. It also reinforces a growth mindset from an early age: the message isn’t “you played perfectly,” it’s “you practiced today, and that matters.” This subtle but important distinction helps children understand that effort, not just outcome, is worth celebrating.
Consistency in music practice also has measurable cognitive benefits. Studies have shown that regular engagement with music strengthens neural pathways associated with memory, language processing, and executive function. By helping your child build a practice habit early — even if sessions are only 10 to 15 minutes long — you’re investing in far more than musical skill. You’re nurturing the kind of focused, disciplined thinking that supports learning across all areas of life.
What Is a Music Practice Sticker Chart?
A music practice sticker chart is a simple visual tool, typically printed on a single sheet of paper, that allows children to record each completed practice session by placing a sticker in a designated spot. The chart usually spans a set period — a week, a month, or a school term — and is designed to be colourful, engaging, and age-appropriate. Some charts feature music-themed illustrations like notes, instruments, or little characters playing the piano or violin. Others use a grid or calendar format where each day has its own sticker space.
The “printable” aspect means families can easily download and print these charts at home, customise them to suit their child’s interests, and reprint them whenever needed. This makes them incredibly accessible and cost-effective. You don’t need to purchase a special reward system or invest in any technology — just a printer, some paper, and a pack of your child’s favourite stickers. The simplicity is part of what makes it so effective for busy families.
Music practice sticker charts can be adapted for children at virtually any stage of their musical journey. Whether your toddler is attending structured early music classes or your kindergartener is just beginning piano lessons, there’s a format that fits. The key is keeping the chart age-appropriate: younger children benefit from charts covering just one week at a time with large, easy-to-fill spaces, while older children can handle monthly charts with more detailed goal-tracking sections.
The Developmental Benefits of Using a Sticker Chart
Beyond the immediate motivation to practice, a well-used music sticker chart delivers a surprising range of developmental benefits. Understanding these can help parents use the tool more intentionally and get even more value from it.
Building a sense of autonomy: When a child places their own sticker on the chart after practice, they are taking ownership of their learning. This small act of self-management teaches children that they are in charge of their own progress, which is a foundational element of intrinsic motivation. Over time, children who experience this sense of agency are more likely to continue pursuing music — and other learning goals — independently.
Developing time awareness and routine: Young children thrive on predictability. A sticker chart that is part of a daily or weekly routine helps anchor music practice within the rhythm of family life. Children begin to associate a certain time of day or moment in the week with their practice session, reducing resistance because the activity becomes expected rather than imposed.
Strengthening fine motor skills: For toddlers and preschoolers, the act of carefully peeling and placing a sticker is itself a fine motor activity. This supports the same hand-eye coordination and dexterity that playing an instrument also develops, making the reward moment an extension of the learning itself.
Celebrating effort over perfection: Perhaps the most important benefit is the message the chart sends about what matters. A sticker is earned for showing up and practicing — not for playing a piece flawlessly. This nurtures resilience and a positive relationship with challenge, qualities that music education is uniquely well-positioned to develop. Programs like Happyfeet at The Music Scientist are built around this same philosophy — meeting children where they are developmentally and celebrating participation as the foundation of growth.
How to Create Your Own Printable Music Sticker Chart
Creating a printable music sticker chart at home is easier than you might think, and involving your child in the design process can make them even more excited to use it. Here’s a step-by-step guide to putting one together.
- Choose your timeframe. Decide whether you want a weekly chart (7 boxes) or a monthly chart (up to 31 boxes). For children under 4, a weekly chart is ideal — it feels achievable and gives you frequent opportunities to reset and celebrate. For older preschoolers and kindergarteners, a monthly chart creates a more satisfying sense of long-term progress.
- Pick a music-themed design. Use a free design tool like Canva or Google Slides to create a chart with musical imagery — treble clefs, musical notes, little pianos, or even cartoon characters holding instruments. Bright, primary colours tend to work best for young children. Make sure each day’s sticker space is large enough for small hands to place stickers comfortably.
- Add your child’s name and a goal. Personalisation matters enormously to young children. Write or type their name at the top of the chart, and include a simple goal statement such as “I practiced music every day this week!” This transforms the chart from a generic template into their personal achievement record.
- Print and laminate (optional). If you want to reuse the chart, print it on cardstock and laminate it, then use dry-erase stickers or small magnets instead of traditional stickers. For a simpler approach, just print a fresh sheet each week or month.
- Set up a sticker station. Place the chart somewhere visible — on the fridge, beside the piano, or on a dedicated “music wall” in your child’s room. Keep a tin or small basket of stickers nearby so the reward is always ready. The easier you make the process, the more consistently your child will engage with it.
Some families choose to create a simple reward milestone alongside the chart — for example, after completing a full month of stickers, the child gets to choose a special activity or small musical gift. Keep milestones modest and achievable so the reward feels motivating rather than distant.
Tips for Making the Sticker Chart System Work
Even the most beautifully designed chart can lose its magic if it’s not used thoughtfully. Here are some practical strategies to keep the momentum going over time.
- Keep practice sessions short and positive. For children under 5, aim for 5 to 15 minutes of focused practice rather than long sessions that lead to frustration. The goal is to end on a high note so your child looks forward to the next session.
- Let your child choose their stickers. Give them a sense of control by allowing them to select from a collection of stickers. Star stickers, animal stickers, glittery stickers — the more delightful the sticker, the more meaningful the reward feels.
- Be consistent without being rigid. If a day is missed, don’t treat it as a failure. Simply pick up the next day without guilt. The chart tracks effort over time, not perfection, and your attitude about missed days will shape your child’s response to them.
- Celebrate chart completions together. When a chart is full, make a small ceremony of it. Pin it on the wall, take a photo, or let your child show it to a grandparent. This social acknowledgment amplifies the sense of achievement and motivates the next round.
- Pair the chart with structured learning. A sticker chart works best when there’s meaningful content to practice. If your child is attending music classes, coordinate the chart with what they’re learning in class so home practice reinforces classroom progress.
It’s also worth noting that different children respond differently to reward systems. Some are highly motivated by visible progress charts, while others are more intrinsically driven and may only need the chart for a few weeks before internalising the practice habit. Pay attention to your child’s cues and be willing to adapt the system as they grow.
Beyond the Chart: Building a Lifelong Love of Music
A sticker chart is a wonderful starting point, but it’s just one piece of the larger puzzle of raising a child who genuinely loves music. The most powerful driver of long-term musical engagement isn’t external rewards — it’s the joy of discovery, expression, and connection that music provides. Your role as a parent is to create an environment where music feels like a natural, wonderful part of everyday life rather than another item on the to-do list.
This means singing together in the car, dancing in the kitchen, and listening to a wide variety of musical styles at home. It means being present and enthusiastic when your child plays for you, no matter how simple the melody. And it means choosing quality music education experiences that meet your child developmentally — programs that understand how young brains learn and that make music a source of delight rather than stress.
For families in Singapore with little ones from 4 to 47 months, The Music Scientist offers a range of developmentally-designed programmes that make this kind of joyful musical foundation possible. The Tenderfeet programme supports sensory and musical development for infants, while Groovers brings music and movement together for energetic toddlers. For families preparing children for the transition to formal schooling, the SMART-START English and SMART-START Chinese programmes integrate music with early literacy and cognitive readiness in a beautifully holistic way.
When children experience music as something that is celebrated — through sticker charts at home, through joyful classes with their peers, through songs that teach them about the world — they develop not just musical skills, but confidence, curiosity, and a love for learning that carries them far beyond the music room.
A printable music sticker chart is one of the simplest and most effective tools a parent can use to help a young child build a consistent practice habit. By making progress visible, celebrating effort over perfection, and turning practice into a daily ritual worth looking forward to, you’re laying the groundwork for a meaningful and lasting relationship with music. Start small, stay consistent, and let the stickers do some of the heavy lifting — you might be surprised at how much a little square of sparkly paper can inspire.
The most important thing to remember is that behind every sticker is a moment of bravery and effort from your child. Every time they sit down to practice, they’re learning something far bigger than music — they’re learning that showing up, day after day, is how growth happens. And that lesson will serve them for a lifetime.
Ready to give your child a musical head start?
At The Music Scientist, we design every programme around the way young children actually learn — through movement, play, song, and discovery. Whether your little one is a curious infant or an energetic preschooler, we have a programme that meets them exactly where they are. Explore our classes and find the perfect fit for your family.
There is something almost magical about the moment a young child reaches out to touch a glowing surface and hears a sound in response. Their eyes widen, their hands freeze for a split second, and then — pure delight. That moment of cause-and-effect discovery is not just adorable; it is one of the most powerful learning experiences a developing brain can have. A DIY sensory-music table combining light and sound gives your baby or toddler exactly this kind of multi-sensory magic, right in the comfort of your home.
Building one does not require a background in engineering or a hefty budget. With some thoughtful materials and a little creativity, you can create an activity station that engages your child’s senses, encourages musical exploration, and supports critical developmental milestones from as early as four months old. Whether you are a parent, grandparent, or early childhood educator, this guide walks you through everything — from the developmental rationale to the build itself, play ideas, and important safety considerations.
Why a Sensory-Music Table? The Science Behind Light, Sound, and Play
Young children learn through their senses long before they learn through language. In the earliest months and years of life, the brain is forming neural connections at a staggering rate, and every tactile touch, visual stimulus, and auditory experience contributes to this wiring process. When you combine light and sound in a single interactive surface, you are essentially creating a multi-sensory environment that engages multiple brain regions simultaneously, deepening the learning experience far beyond what a single-sense activity can offer.
Research in early childhood development consistently shows that multi-sensory play accelerates cognitive growth, improves memory formation, and enhances attention span in infants and toddlers. Sound, in particular, plays a unique role. Music and rhythmic sound stimulate the auditory cortex, strengthen language processing pathways, and even support early mathematical thinking through the patterns and sequences embedded in musical structures. When a child taps a glowing panel and hears a tone, they are not just playing — they are learning about cause and effect, spatial relationships, rhythm, and emotional expression all at once.
This is the philosophy at the heart of programs like Tenderfeet at The Music Scientist, which uses music, movement, and sensory input together to support infant cognitive and emotional development from as early as four months. A sensory-music table at home extends this kind of enriched, intentional play into everyday life.
Developmental Benefits by Age Group
One of the greatest strengths of a sensory-music table is its versatility. The same table that captivates a six-month-old with shifting colours will become a rhythmic percussion station for a two-year-old and a creative storytelling prop for a three-year-old. Here is how the benefits evolve across the early childhood window:
- 4 to 12 months (Infants): Visual tracking of light stimulates focus and eye coordination. Gentle sounds encourage auditory discrimination and calm the nervous system. Supervised exploration with hands and fingers builds tactile awareness.
- 12 to 18 months (Young Toddlers): Cause-and-effect discovery accelerates as babies begin to understand that their actions produce outcomes. Banging, pressing, and swiping the table surface strengthens fine and gross motor skills. Emotional regulation is supported through rhythmic, predictable sound responses.
- 18 to 36 months (Toddlers): Language development is enriched as caregivers narrate the play (“That’s a high sound! That’s a low sound!”). Musical patterning supports early numeracy. Creative play expands as toddlers begin to invent their own “songs.” This age group maps closely to The Music Scientist’s Happyfeet and Groovers programmes, which build on exactly these emerging capacities.
- 3 to 4 years (Preschoolers): Social play around the table teaches turn-taking and collaboration. Children begin to recognise and reproduce simple melodies, laying foundations for music literacy. The Scouts programme at The Music Scientist leverages this stage beautifully, connecting science themes with musical exploration.
What You’ll Need: Materials and Tools
The beauty of a DIY sensory-music table is that you can scale the complexity to match your budget, your child’s age, and your own comfort with building things. Below is a tiered materials list that covers both a simple starter version and a more elaborate build.
Core structure:
- A shallow storage bin or IKEA FLISAT children’s table (widely used as a sensory table base)
- A sheet of white acrylic or frosted perspex (cut to fit the table opening)
- Four to six short wooden or PVC pipe legs (if building from scratch), or an existing low table
- Non-toxic wood glue or waterproof adhesive
- Sandpaper (for smoothing any raw edges)
Light elements:
- LED light strip with colour-changing remote (USB-powered for safety)
- Alternatively, a battery-powered LED light pad (available from art supply stores)
- Diffusion material or tracing paper to soften direct LED glare
Sound elements:
- A small Bluetooth speaker or a set of pressure-sensitive musical buttons (toy keyboards work wonderfully)
- DIY option: place a children’s musical mat underneath a translucent surface so pressing the surface activates the keys
- Wind chimes, small bells, or hand drums as supplementary acoustic instruments around the table
Tools:
- Drill or screwdriver
- Measuring tape and marker
- Safety goggles and gloves for cutting acrylic
Step-by-Step: Building Your DIY Sensory-Music Table
Before you begin, clear a well-ventilated workspace and keep young children away from the build area. Once completed, the table is entirely child-safe — it is the construction process that requires adult-only attention.
- Prepare your base. If using an IKEA FLISAT table, remove the inner tray. If building from scratch, construct a shallow rectangular frame from wood panels approximately 10 to 12 centimetres deep. Sand all surfaces smooth and wipe away any dust before assembly.
- Cut and fit the translucent surface. Measure the opening of your table frame carefully and have your acrylic sheet cut to size (many hardware stores will do this for you). Lay a sheet of diffusion paper or tracing paper directly beneath the acrylic to create an even, soft glow rather than harsh LED spots.
- Install the light layer. Place your LED light strip or light pad inside the base of the table, beneath the diffusion layer. If using an LED strip, run the USB cable out through a small notch at the back of the frame. Ensure no wires are accessible to little fingers once the surface is secured.
- Add the sound layer. Position your musical mat, pressure-sensitive buttons, or Bluetooth speaker either directly beneath the acrylic surface or along the sides of the table within easy reach. Test that pressing on the acrylic surface (if using a musical mat underneath) produces a clear, satisfying sound.
- Secure the surface. Once happy with the placement of all components, secure the acrylic sheet in place with small rubber bumpers or adhesive foam strips along the edges. This keeps the surface stable without permanently sealing the table, so you can access the electronics for battery changes or adjustments.
- Test thoroughly before use. Turn on the lights and sound elements, press firmly on different parts of the surface, and check that no components shift or expose wiring. Wipe the acrylic surface with a child-safe cleaning cloth before your child’s first play session.
Sensory Play Ideas to Use With Your Table
The table itself is just the beginning. What you place on and around it transforms the experience week by week, keeping the play fresh and developmentally stretching. Here are some ideas to try across different ages and themes.
- Translucent colour mixing: Place coloured transparent tiles or coloured water in zip-lock bags on the light surface. As children rearrange them, they discover colour mixing while the light underneath makes the effect visually stunning.
- Nature exploration: Lay leaves, flowers, or feathers on the glowing surface and encourage children to tap the musical elements while they observe. This links beautifully to the science-meets-music approach of The Music Scientist’s Scouts programme.
- Rhythm tracing: Play a simple rhythm on a drum or clap a pattern, then invite your child to reproduce it by pressing the musical buttons on the table. This builds auditory memory and rhythmic awareness simultaneously.
- Loose parts play: Scatter gems, wooden discs, or smooth pebbles on the lit surface. Toddlers love sorting and arranging these while the ambient glow heightens visual engagement.
- Singalong sessions: Use the table as a musical backdrop during your favourite nursery rhymes or songs. The light creates a stage-like atmosphere that encourages performance, expression, and confidence.
Safety Tips for Sensory Tables at Home
Child safety is always the first consideration when building any home play equipment. A well-built sensory-music table is extremely safe, but there are several precautions worth taking seriously, especially for children under 18 months who are still exploring the world through their mouths.
- Always use USB or battery-powered LED systems rather than mains-connected lighting inside the table. This eliminates electrical shock risk entirely.
- Ensure all cables and battery compartments are fully concealed and secured with screws rather than clips, which small fingers can open.
- Check the acrylic surface regularly for cracks or sharp edges. Replace immediately if any damage is found.
- Avoid placing loose small objects (beads, small gems) on the table with children under three, as these pose a choking hazard. Use larger translucent tiles or sealed sensory bags instead.
- Supervise all sessions with infants and very young toddlers. The table is designed for supported, engaged play, not unsupervised independent activity.
- Clean the surface with a non-toxic, fragrance-free cloth between sessions to maintain hygiene, especially if multiple children are using the table.
Taking It Further: From Home Play to Structured Music Learning
A DIY sensory-music table is a wonderful way to ignite your child’s love of sound, rhythm, and sensory exploration at home. But home play works best when it is part of a broader developmental journey. Structured music enrichment in a social setting gives children access to group dynamics, professionally designed curricula, and trained educators who understand how to pace and challenge young learners at precisely the right developmental moments.
At The Music Scientist, every programme is designed with this developmental precision in mind. Infants as young as four months can join Tenderfeet, where music, sensory play, and movement come together in a nurturing class environment. Toddlers who are beginning to find their musical voice will thrive in Happyfeet or the dance-infused Groovers programme. For children approaching preschool age, the SMART-START English and SMART-START Chinese programmes use music as a bridge into formal learning, building early literacy, confidence, and a genuine love of discovery.
Think of your sensory-music table as the spark — and structured music enrichment as the ongoing flame that keeps your child’s love of learning burning brightly.
Your Child’s World of Sound and Light Awaits
Building a DIY sensory-music table is one of the most meaningful gifts you can give a young child: an environment that celebrates their curiosity, responds to their touch, and wraps everyday play in the beauty of music and light. From the first wide-eyed moment of discovery to the confident little musician who creates their own rhythms, this table grows with your child through some of the most formative years of their life.
Take your time with the build, involve older siblings in play ideas, and most importantly — get down on the floor and play alongside your child. Because the greatest developmental tool of all is still you.
Ready to Take Your Child’s Musical Journey Further?
The Music Scientist offers expert-designed music enrichment programmes for babies, toddlers, and preschoolers right here in Singapore. Whether your little one is four months or four years old, there is a programme built just for them — combining music, movement, and science in ways that make learning unforgettable.
There is something quietly extraordinary that happens when a parent sings to their baby. The infant’s eyes widen, their body relaxes, and for a few precious moments, the whole world narrows to the sound of a familiar voice and the gentle pulse of a melody. What many parents intuitively feel in these moments, science is now confirming with remarkable clarity: oxytocin release in parent-infant music interactions is real, measurable, and profoundly important for both the child’s development and the parent-child relationship.
Oxytocin, often called the “bonding hormone” or the “love hormone,” surges in both parents and infants during shared musical experiences — from lullabies at bedtime to rhythmic movement songs during play. Understanding why this happens, and how to harness it intentionally, can transform the way you engage with your baby in the earliest and most critical months of life. This article explores the neuroscience behind oxytocin and music, the developmental benefits this combination unlocks, and practical ways you can use music every day to deepen your bond with your little one.
What Is Oxytocin and Why Does It Matter for Your Baby?
Oxytocin is a neuropeptide produced in the hypothalamus and released by the pituitary gland. It plays a central role in social bonding, trust, and emotional regulation across the lifespan. In the context of early parenthood, oxytocin levels rise during skin-to-skin contact, breastfeeding, eye contact, and — crucially — during shared musical experiences. For infants, whose nervous systems are still in rapid development, oxytocin does not just feel good; it actively shapes the architecture of the developing brain.
Research published in journals such as Frontiers in Psychology and Psychoneuroendocrinology has demonstrated that oxytocin facilitates the formation of secure attachment between caregivers and infants. A securely attached child is more likely to develop healthy emotional regulation, stronger cognitive abilities, and greater resilience to stress later in life. This means that every moment of musical connection between a parent and baby is not simply enjoyable — it is neurologically formative. The hormone essentially tells the infant’s brain: you are safe, you are loved, and you can trust the world around you.
Importantly, oxytocin works as a two-way street. When a parent sings to or rocks their baby in rhythm, the parent’s own oxytocin levels rise too. This creates a positive feedback loop where both caregiver and infant experience increased feelings of warmth and connection, making the interaction self-reinforcing and deeply rewarding for both parties.
How Music Triggers Oxytocin Release in Parents and Infants
Music is one of the most potent non-pharmacological triggers of oxytocin release known to researchers. A landmark study by Nilsson (2009) found that patients exposed to soothing music showed measurably higher oxytocin levels compared to control groups. In the parent-infant context, the mechanisms are even more layered. When a caregiver sings to a baby, the interaction simultaneously activates multiple oxytocin-releasing pathways: vocal resonance, rhythmic touch, sustained eye contact, and emotional attunement all converge in a single shared moment.
Infants as young as four months old have been shown to prefer music that is sung directly to them over music played from a device, even when the acoustics are identical. Researchers at McMaster University demonstrated that babies engage more actively and for longer durations when a live human voice — especially a caregiver’s voice — delivers the melody. This preference is not coincidental. The infant brain is wired to respond to the nuances of human vocal music: the slight pitch variations, the embedded emotional tone, and the synchrony between the singer’s face and their sound. These are the very cues that trigger oxytocin release and signal social safety.
Rhythmic synchrony deserves particular attention. When a parent bounces a baby in time with a song, or claps along to a beat while maintaining eye contact, both individuals begin to physiologically synchronize — their heart rates, breathing patterns, and brain wave activity converge. This process, known as entrainment, is a powerful biological mechanism through which oxytocin is amplified. The baby’s brain, in effect, learns to associate rhythmic musical interaction with the sensation of being understood and cared for.
The Bonding Benefits of Singing and Moving Together
The bonding benefits that emerge from oxytocin-rich musical interactions extend well beyond the immediate moment of song. Longitudinal studies have found that infants who experience frequent musical engagement with their caregivers in the first year of life display stronger attachment security at 12 months. They are more easily soothed during distress, more willing to explore their environment (a key marker of secure attachment), and more responsive to social cues from both familiar and unfamiliar adults.
For parents, particularly new mothers navigating the emotional complexity of the postpartum period, the oxytocin released during musical play provides measurable relief. Research indicates that caregivers who regularly engage in musical activities with their infants report lower levels of postpartum anxiety and depression, and greater feelings of parenting self-efficacy. Music, it turns out, is not just good for the baby — it actively supports the parent’s wellbeing too, creating a more nurturing and emotionally available caregiver overall.
Beyond dyadic bonding, group musical settings introduce infants to the experience of social synchrony with multiple people simultaneously. When a baby attends a music class and participates in shared songs alongside other families, they begin developing the foundations of social cognition — the understanding that other minds exist, that coordinated action is possible, and that interaction with the wider world is safe and enjoyable. This is oxytocin at work on a community level, building the roots of empathy and social awareness from the very first months of life.
Oxytocin, Music, and Early Brain Development
The intersection of oxytocin and music reaches deep into the mechanics of infant brain development. The first three years of life represent a period of extraordinary neuroplasticity, during which synaptic connections are formed at a rate never again matched in the human lifespan. Oxytocin actively promotes synaptic growth and dendritic branching in the limbic system — the region of the brain responsible for emotional processing and memory formation. When oxytocin is released consistently through musical bonding experiences, it creates a neurochemical environment that is fundamentally favorable for learning.
Music itself further accelerates this developmental advantage by simultaneously engaging multiple brain regions. The auditory cortex processes pitch, rhythm, and timbre; the motor cortex activates in response to beat and movement; the prefrontal cortex develops executive function through the anticipation and prediction that musical patterns demand. When these regions are activated within the warm, oxytocin-rich context of a caregiver interaction, the brain effectively encodes the experience as both emotionally significant and cognitively stimulating. This dual encoding strengthens memory traces and accelerates the development of language, attention, and early reasoning skills.
Researchers have also found that infants who experience music-based interactions with elevated oxytocin show better emotional regulation — the ability to manage strong feelings, transition between states of arousal, and respond flexibly to environmental changes. This capacity, rooted in the limbic system and supported by oxytocin’s calming influence, is one of the strongest predictors of academic readiness and social success in later childhood. In other words, the lullaby you sing tonight is laying groundwork for the focused, emotionally balanced learner your child will become.
Simple Ways to Use Music to Strengthen Your Parent-Infant Bond
You do not need to be a trained musician to harness the oxytocin-boosting power of music with your baby. The research consistently shows that it is the quality of the social interaction — the eye contact, the responsiveness, the physical attunement — rather than the technical quality of the singing that drives the neurochemical response. Here are some practical, evidence-informed ways to integrate musical bonding into your daily routine:
- Sing during caregiving routines: Bath time, nappy changes, and feeding are ideal moments for gentle, repetitive songs. The predictability of a routine combined with familiar music deepens the infant’s sense of safety and anticipation.
- Respond to your baby’s vocalisations musically: When your baby babbles or coos, try matching their pitch and rhythm with your voice. This turn-taking lays the groundwork for both language development and social reciprocity.
- Use rhythmic movement alongside song: Rocking, bouncing, or swaying in time with a melody activates the entrainment mechanism, amplifying oxytocin release through the combination of tactile rhythm and auditory stimulation.
- Choose live singing over recorded music: While recorded music has its place, the face-to-face connection and vocal responsiveness of live singing triggers significantly more oxytocin in both you and your baby.
- Create musical rituals: A consistent sleep song, a morning greeting melody, or a special song for moments of comfort becomes a powerful emotional anchor for your infant, associated neurologically with safety, love, and your presence.
The cumulative effect of these small, everyday musical moments is significant. Infants who experience consistent musical engagement across their first two years develop stronger neural pathways associated with language, attention, and emotional intelligence — all traceable, in part, to the oxytocin-rich bonding experiences that music uniquely provides.
Why Structured Music Classes Amplify These Effects
While home-based musical interactions are invaluable, structured music programmes designed specifically for infants and toddlers provide an additional layer of developmental richness that is difficult to replicate independently. Purpose-built curricula align musical activities with developmental milestones, ensuring that the music your baby engages with is calibrated to their current neurological and physical capacities. This precision maximises the developmental yield of each session and provides parents with the tools and confidence to continue musical engagement at home.
At The Music Scientist, our programmes are designed with exactly this science in mind. Our Tenderfeet programme, crafted for babies in their earliest months, uses carefully composed original music, sensory play, and guided caregiver participation to create precisely the kind of oxytocin-rich, synchronised musical environment that research identifies as most beneficial for infant brain development and parent-child bonding.
As your child grows into the toddler years, our Happyfeet classes for 18-month-olds build on these foundations by introducing more complex rhythmic patterns, group musical interaction, and early movement coordination — all within a warm, attachment-supportive environment. For older toddlers ready to explore music through energetic dance and creative play, our Groovers programme channels the natural exuberance of this developmental stage into meaningful musical learning.
Our Scouts programme takes musical learning a step further by weaving scientific concepts into catchy, memorable melodies — fostering curiosity and early cognitive skills through the same neurochemical pathways that musical bonding activates. And for families preparing their children for the transition to formal schooling, our SMART-START English and SMART-START Chinese preschool readiness programmes use music as a core learning medium to develop literacy, numeracy, and school-readiness skills in both English and Mandarin.
What unites all of these programmes is the understanding that music is not merely an enrichment activity — it is a developmental tool of the highest order, one that works in harmony with your child’s neurobiology to build the emotional, cognitive, and social foundations they will carry throughout their entire lives.
Conclusion
The science is both clear and beautiful: when you sing to your baby, hold them close, and move together in rhythm, you are doing far more than passing the time. You are flooding both of your brains with oxytocin, sculpting the neural architecture of your child’s developing mind, and building a bond that will serve as the emotional foundation for everything that follows. Oxytocin release in parent-infant music interactions is not a metaphor for warmth — it is a measurable, repeatable biological reality that makes music one of the most powerful parenting tools available to you from the very first days of life.
The most important thing to remember is this: you do not need to be perfect. You do not need to be in tune. You simply need to show up, make eye contact, and sing. Your baby’s brain is already wired to respond to you, and every musical moment you share together is an investment in their wellbeing, their development, and the irreplaceable relationship between the two of you.
Discover Music Classes Designed for Your Baby’s Development
At The Music Scientist, every song, rhythm, and movement in our programmes is purposefully designed to support your baby’s neurological, emotional, and cognitive growth — while deepening the bond between you. Whether your little one is a newborn or approaching preschool age, we have a programme crafted for exactly where they are right now.
Ready to experience the science of music with your child? Get in touch with us today and find the perfect programme for your family.
If you have ever watched a baby squeeze a fistful of mashed banana with pure, wide-eyed delight, you have witnessed sensory play in its most natural form. For infants, touching, tasting, smelling, and exploring textures is not just messy fun — it is how they learn about the world. Taste-safe sensory bins for infants take this instinct and turn it into a structured, stimulating experience that supports brain development, fine motor skills, and curiosity, all while keeping your little one completely safe.
The challenge for parents and caregivers is finding recipes that are genuinely edible-safe (because babies will absolutely put everything in their mouths) while still offering rich, interesting textures and sensory variety. In this guide, we have pulled together 10 taste-safe sensory bin recipes designed specifically for infants, complete with developmental benefits, simple ingredient lists, and tips for making the most of each play session. Whether your baby is just starting to sit up or is already crawling toward everything in sight, there is something here for every stage of that first year.
Why Sensory Bins Matter for Infants
Sensory play is far more than a trendy parenting activity — it is grounded in decades of developmental research. When an infant plunges their hands into a new texture, their brain forms thousands of new neural connections. These connections lay the groundwork for language development, problem-solving, emotional regulation, and even early mathematics. The earlier and more varied the sensory experiences a baby encounters, the richer the foundation they build for future learning.
For infants specifically, sensory bins support the development of the tactile system (touch and texture discrimination), proprioception (body awareness through movement and pressure), and oral motor skills when babies explore materials with their mouths. Fine motor skills also get a wonderful workout as little fingers squeeze, rake, poke, and pinch through different materials. At The Music Scientist, we see these benefits firsthand in our Tenderfeet infant care classes, where sensory engagement is woven into every session alongside music and movement to create a multi-sensory learning environment that truly resonates with the youngest learners.
Safety First: What Makes a Sensory Bin Truly Taste-Safe
Before diving into the recipes, it is worth being clear about what “taste-safe” actually means. A taste-safe material is one that will not harm a baby if mouthed or accidentally swallowed in small amounts. This is different from “edible” in the traditional sense — taste-safe materials are not necessarily nutritious meals, but they are free from choking hazards, toxic ingredients, and harmful chemicals.
When preparing sensory bins for infants, keep these principles in mind:
- Use whole-food ingredients where possible — things like cooked grains, pureed vegetables, and plain dairy products.
- Avoid common allergens for young babies who have not yet been introduced to certain foods. Always check with your paediatrician if you are unsure.
- Supervise at all times. Even with taste-safe materials, an infant should never be left unattended during sensory play.
- Keep portions appropriate. Sensory bins are for exploration, not consumption. If your baby eats a little, that is fine — but the goal is play, not a meal.
- Check for temperature. All cooked ingredients should be cooled to room temperature before use.
With those ground rules in place, let us get into the good stuff.
10 Taste-Safe Sensory Bin Recipes for Infants
1. Oatmeal Cloud Bin
Cook plain rolled oats with a little extra water until they reach a thick, fluffy consistency, then allow them to cool completely. Spread the oatmeal across a shallow tray or bin and let your infant run their hands through it. The soft, slightly sticky texture provides rich tactile feedback, and the gentle, neutral scent is calming rather than overwhelming. You can add a small amount of natural food colouring (beet juice for pink, spinach puree for green) to make the bin even more visually stimulating.
What You’ll Need:
- 1 cup rolled oats, cooked and cooled
- Optional: natural food colouring
- Shallow tray or bin
Developmental Benefits: Tactile discrimination, hand-eye coordination, visual tracking of colour.
2. Mashed Banana and Puffed Rice Bin
Mash one or two ripe bananas until smooth, then stir in a handful of puffed rice cereal for added texture contrast. The combination of soft, sticky banana and light, airy puffed rice gives babies two very different textures to discover in one bin. The natural sweetness of banana tends to be a favourite for infants, making this one of the most enthusiastically received recipes on this list.
What You’ll Need:
- 2 ripe bananas, mashed
- 1/2 cup puffed rice cereal
- Shallow bin
Developmental Benefits: Fine motor exploration, oral motor stimulation, sensory contrast processing.
3. Jelly Sensory Bin
Prepare plain, unflavoured gelatin or a baby-appropriate jelly (low sugar, no artificial sweeteners) and set it in a shallow container. Once cooled, cut it into cubes or simply let your baby explore the whole jiggly surface. Jelly is uniquely captivating for infants because it is smooth, cool, and responds dramatically to touch — it wobbles, tears, and squishes in surprising ways that delight babies at every stage.
What You’ll Need:
- 1 packet unflavoured gelatin or low-sugar jelly crystals
- Water (as per packet instructions)
- Shallow tray
Developmental Benefits: Cause-and-effect understanding, tactile sensitivity, visual tracking of movement.
4. Cooked Spaghetti Bin
Cook spaghetti or any long pasta until soft (slightly past al dente is ideal for infants), cool thoroughly, and toss with a small drizzle of olive oil to prevent sticking. Place the strands in a large bin and watch your baby pull, grab, and tangle the noodles with endless fascination. This bin is particularly wonderful for developing the palmar grasp and early pincer grip, as babies work to separate and hold individual strands.
What You’ll Need:
- 1 cup cooked spaghetti, cooled
- A few drops of olive oil
- Optional: natural food colouring added to cooking water
Developmental Benefits: Grasp development, bilateral hand coordination, proprioceptive input.
5. Greek Yoghurt Finger Paint Bin
Spoon plain, full-fat Greek yoghurt into a large shallow tray and let your infant smear, swirl, and splat to their heart’s content. You can divide the yoghurt into sections and tint each portion with natural food colouring for a multi-coloured experience. The cool, creamy texture is deeply satisfying, and the act of spreading creates early mark-making experiences that lay groundwork for later writing skills.
What You’ll Need:
- 1 cup plain full-fat Greek yoghurt
- Optional: beet juice, turmeric, or spirulina for natural colour
- Large shallow tray
Developmental Benefits: Fine motor control, early mark-making, sensory tolerance of wet textures.
6. Puffed Quinoa Snow Bin
Puffed quinoa (available at most health food stores) creates a beautiful, snow-like sensory base that is light, airy, and completely safe to taste. Fill a deep bin with puffed quinoa and partially bury small, baby-safe objects or brightly coloured silicone toys for your infant to discover. The gentle crunching sound as babies run their hands through it adds an auditory dimension that makes this bin especially engaging.
What You’ll Need:
- 2–3 cups puffed quinoa
- Deep bin or tray
- Optional: brightly coloured silicone teethers or toys for discovery play
Developmental Benefits: Auditory-tactile integration, object permanence exploration, sensory tolerance of dry textures.
7. Chia Seed Gel Bin
Soak two tablespoons of chia seeds in one cup of water for about 20 minutes until they form a thick, slippery gel. Transfer the gel to a shallow bin and let your baby explore the unusual, slick texture. Chia gel is one of the more surprising sensory experiences for infants — it clings to fingers in small clumps and has a unique consistency unlike anything else on this list. It is entirely safe if mouthed and is actually nutritionally rich, which is a bonus.
What You’ll Need:
- 2 tablespoons chia seeds
- 1 cup water
- 20 minutes soaking time
Developmental Benefits: Tactile tolerance (particularly for texture-sensitive babies), fine motor exploration, sensory discrimination.
8. Mashed Sweet Potato Bin
Steam or boil sweet potato until very soft, then mash it with a little water or breast milk until smooth. Allow it to cool to room temperature before offering it in a shallow bin. Sweet potato’s naturally vibrant orange colour makes it visually stimulating, and its dense, sticky consistency gives babies a satisfying squishing experience. This bin also works beautifully as a transition into baby-led weaning textures for infants around 6 months and older.
What You’ll Need:
- 1 medium sweet potato, cooked and mashed
- Splash of water or breast milk to adjust consistency
- Shallow tray
Developmental Benefits: Visual colour stimulation, tactile processing, fine motor strength building.
9. Soft Cooked Rice Bin
Cook white rice until it is very soft and slightly sticky, then cool it fully. Spread it across a large, shallow tray and let your baby rake, pat, squeeze, and explore. Rice is one of the most versatile sensory base materials because it can be used warm (with supervision) or cool, plain or tinted, and in small or large quantities depending on your setup. Its familiar scent is comforting, which makes it a great choice for babies who are new to sensory bins and may need a gentler introduction.
What You’ll Need:
- 1 cup white rice, cooked soft and cooled
- Optional: saffron, turmeric, or beet juice for natural colour
- Large shallow tray
Developmental Benefits: Tactile desensitisation, fine motor coordination, olfactory (smell) stimulation.
10. Cream Cheese Squish Bin
Soften plain cream cheese at room temperature and spread it generously across a large tray. The smooth, dense texture is incredibly satisfying to squish and spread, and because cream cheese holds its shape slightly, it retains the marks babies make — creating a simple record of their exploration that you can even photograph before clean-up. Divide the tray into sections with different natural food colourings to add a visual element, or press simple shapes into the surface using silicone moulds for older infants to discover.
What You’ll Need:
- 250g plain cream cheese, room temperature
- Optional: natural food colouring, silicone shape moulds
- Large flat tray
Developmental Benefits: Fine motor strength, early mark-making, cause-and-effect understanding.
Tips for a Successful Sensory Play Session
Getting the most out of sensory bin time is as much about the environment and approach as it is about the recipe itself. Here are some simple strategies to keep sessions positive, safe, and developmentally rich:
- Start small. Introduce just a small amount of a new material at first, especially for younger babies or those who show signs of texture sensitivity. Let them observe before they touch.
- Follow your baby’s lead. Some babies will dive in immediately; others will take several sessions to warm up to a new texture. Both are completely normal.
- Narrate the experience. Talk to your baby as they explore — describe what they are touching, how it feels, and what they are doing. This language-rich environment accelerates vocabulary development.
- Set up for easy clean-up. Place the bin on a large splat mat or shower curtain, and undress your baby to a nappy or vest beforehand. Sensory play is beautifully messy, and that is part of the magic.
- Keep sessions short. Fifteen to twenty minutes is often enough for infants before they become overstimulated or tired. Watch for cues like turning away, fussing, or eye-rubbing that signal it is time to wrap up.
Pairing Sensory Play with Music for Deeper Learning
One of the most powerful ways to amplify the developmental benefits of sensory bin play is to pair it with music. Research consistently shows that music enhances memory, focus, and emotional regulation in young children — and when combined with tactile exploration, it creates a truly multi-sensory learning experience that engages multiple areas of the brain simultaneously. Try playing gentle, rhythmic music during sensory bin sessions and notice how your baby begins to synchronise their movements with the beat. This is an early sign of developing musical intelligence and body awareness.
At The Music Scientist, this integration of sensory experience and music is at the heart of everything we do. Our Tenderfeet programme is specifically designed for babies from 4 months, using original music, movement, and sensory engagement to nurture early cognitive development. As your child grows, our Happyfeet classes for 18-month-olds and toddlers and our Groovers music and dance classes continue building on these foundations with age-appropriate musical and movement experiences. For parents who want to take their child’s holistic development even further, our SMART-START English and SMART-START Chinese preschool readiness programmes prepare children for a confident, seamless transition into formal education.
The beauty of combining sensory play at home with structured music enrichment classes is that the two approaches reinforce each other beautifully. What your baby explores through their fingertips at home becomes richer and more meaningful when paired with the songs, rhythms, and movement experiences they encounter in class — and vice versa.
Giving Your Baby the Best Sensory Start
Taste-safe sensory bins are one of the simplest, most effective gifts you can offer your infant during these critical early months. Each recipe on this list is an invitation for your baby to explore, discover, and grow — building the neural pathways that will support their learning for years to come. The best part? You do not need expensive equipment or elaborate setups. A handful of kitchen staples, a shallow tray, and a curious baby are all it takes to create a genuinely meaningful developmental experience right at home.
As you explore these recipes, remember that the most important ingredient in any sensory bin session is your presence. Sit with your baby, respond to their reactions, name what they are touching and doing, and celebrate every squish, swipe, and splash. Those moments of shared exploration are not just developmentally valuable — they are the building blocks of your bond.
Ready to Take Your Baby’s Development Further?
At The Music Scientist, we believe every baby deserves a rich, multi-sensory start in life. Our specially designed programmes for infants, toddlers, and preschoolers combine the power of music, movement, and sensory exploration to nurture young minds and build a lifelong love of learning.
Whether you are looking for infant classes, toddler enrichment, or preschool readiness programmes in Singapore, we would love to welcome your family into our community.
Table Of Contents
- What Is a Soundproofing Box Test?
- Why This Project Is Perfect for Young Learners
- What You’ll Need for Your Soundproofing Box
- Step-by-Step Instructions
- The Science Behind Soundproofing
- Materials to Test and Compare
- How to Record and Present Your Results
- Connecting Sound Science to Music Learning
- Tips for STEM Fair Success
Sound is everywhere in our children’s lives—from the melodies they learn in music classes to the everyday noises that fill their world. But have you ever wondered how we can control, reduce, or block sound? A soundproofing box test is one of the most engaging and educational STEM fair projects for young scientists, combining hands-on experimentation with real-world applications that children can observe and understand.
This project goes beyond simple science fair requirements. It helps children develop critical thinking skills, understand cause and effect, practice the scientific method, and explore concepts in physics and acoustics—all while creating something they can see, hear, and touch. For parents whose children are enrolled in music enrichment programs, this experiment offers a wonderful opportunity to deepen their understanding of how sound behaves, which naturally enhances their musical awareness and auditory development.
In this comprehensive guide, we’ll walk you through everything you need to know to create a successful soundproofing box test. Whether your child is preparing for their first science fair or you’re simply looking for an educational weekend activity, this project provides the perfect balance of scientific rigor and age-appropriate fun. Let’s explore how different materials can muffle, absorb, or block sound waves, turning your young learner into a confident sound scientist.
What Is a Soundproofing Box Test?
A soundproofing box test is a science experiment that investigates how effectively different materials reduce sound transmission. The basic concept involves placing a sound source (like a timer, buzzer, or music player) inside a container and then testing various materials to see which ones best block or absorb the sound. This hands-on project allows children to become acoustic engineers for a day, experimenting with the same principles that professionals use when designing recording studios, concert halls, or quiet spaces.
The beauty of this experiment lies in its simplicity and adaptability. Young children can conduct basic tests comparing just two or three materials, while older students can create more complex experimental designs with multiple variables, precise measurements, and detailed data analysis. At its core, the project teaches children about sound waves, acoustic properties, and material science through direct observation and measurement.
What makes this project particularly valuable is that children can actually hear the differences their materials make. Unlike some abstract science concepts, soundproofing provides immediate, sensory feedback that reinforces learning. When a child wraps their sound box in egg cartons and hears the volume decrease, they’re experiencing physics in action—a powerful learning moment that connects theory to reality.
Why This Project Is Perfect for Young Learners
The soundproofing box test aligns beautifully with developmentally appropriate learning practices for children in early elementary years. At The Music Scientist, we understand that children learn best when they can engage multiple senses and intelligences simultaneously, and this project does exactly that. It combines kinesthetic learning (building and wrapping the box), auditory learning (listening to sound changes), logical-mathematical intelligence (measuring and comparing results), and linguistic skills (recording observations and presenting findings).
For children who participate in music programs like our Scouts programme, where science concepts are taught through catchy melodies, this project creates a natural extension of their classroom learning. They’re already familiar with concepts like loud and soft, high and low pitches, and how sound travels. The soundproofing experiment builds on this foundation, helping them understand the physical properties of the sounds they create and hear every day.
This project also supports several key developmental milestones for children aged 4-8 years. It encourages hypothesis formation (“I think cotton will work better than paper”), prediction skills, patience (waiting for results), fine motor development (handling materials and tools), and executive function (following multi-step instructions). Perhaps most importantly, it builds confidence—when children successfully complete a science experiment and can explain their findings, they develop a positive relationship with STEM subjects that can last a lifetime.
What You’ll Need for Your Soundproofing Box
One of the most appealing aspects of this project is that most materials can be found around your home or purchased inexpensively. Gathering materials together can be a fun pre-project activity where children learn to identify and collect resources—a valuable life skill in itself.
Basic Materials:
- One medium-sized cardboard box – A shoebox or small shipping box works perfectly
- Sound source – A battery-operated timer, small radio, smartphone playing music, or electronic buzzer
- Sound measuring tool – A smartphone with a free decibel meter app (like Sound Meter or Decibel X)
- Tape – Masking tape, duct tape, or clear packing tape
- Scissors – Adult supervision recommended for younger children
- Ruler or measuring tape – For recording dimensions
- Notebook and pencil – For recording observations and measurements
Soundproofing Materials to Test:
- Soft materials: Cotton balls, fabric scraps, old towels, felt, socks, bubble wrap
- Dense materials: Cardboard pieces, foam board, cork sheets, rubber mats
- Textured materials: Egg cartons, crumpled newspaper, tissue paper
- Insulating materials: Styrofoam, packing peanuts, acoustic foam (if available)
- Natural materials: Leaves, sand in sealed bags, sawdust
The variety of materials allows children to test different hypotheses about what properties make the best sound barriers. Will soft, fluffy materials work better than dense, heavy ones? Will texture matter? These questions drive scientific inquiry and make the project more engaging than simply following instructions.
Step-by-Step Instructions
Breaking down the experiment into clear, manageable steps helps children develop procedural thinking and ensures reliable results. Take your time with each phase, and encourage your child to ask questions throughout the process.
1. Set Up Your Control Test – Before adding any soundproofing materials, you need to establish a baseline measurement. Place your sound source inside the empty cardboard box and close it. Position your sound measuring device (smartphone with decibel app) exactly 12 inches away from the box. Turn on your sound source and record the decibel reading. This is your control measurement that you’ll compare all other tests against. Have your child write this number down in their notebook with the label “Empty Box (Control).”
2. Prepare Your First Material – Choose one soundproofing material to test first. If using fabric or towels, cut pieces that will completely line the inside of the box. If using cotton balls or packing peanuts, prepare enough to fill the space around your sound source without muffling it directly. The goal is to line the box walls, not to bury the sound source completely. This teaches children about fair testing—each material should be tested under the same conditions.
3. Line the Box – Help your child attach or place the soundproofing material inside the box. Use tape to secure materials to the walls if needed. Make sure the sound source can still fit inside with the materials in place. This step develops fine motor skills and spatial reasoning as children figure out how to maximize material coverage while leaving room for the sound device.
4. Conduct the Test – Place your sound source back inside the lined box and close it. Position your measuring device in exactly the same spot as before (12 inches away). Turn on the sound source and wait a few seconds for the reading to stabilize. Record the decibel measurement in your notebook, clearly labeling which material you tested. Repeat this measurement two or three times to ensure accuracy, teaching children that scientists verify their results.
5. Remove and Reset – Take out the first material completely and return the box to its empty state. This ensures each material gets a fair test. Allow your child to handle this step, reinforcing the importance of controlling variables in an experiment.
6. Test Additional Materials – Repeat steps 2-5 with each different soundproofing material you want to test. Keep all other factors constant: same sound source, same volume setting, same distance for measurement, and same box. Children should record every result carefully, perhaps using a simple data table with columns for “Material Tested” and “Decibel Reading.”
7. Test Combinations – For older children or as an extension activity, try combining materials. Does layering cotton balls inside egg cartons work better than either material alone? This introduces the concept of engineering optimization—finding the best solution by combining different approaches.
The Science Behind Soundproofing
Understanding the science behind the experiment transforms it from a simple activity into meaningful learning. When we explain concepts in age-appropriate ways, children develop deeper comprehension that extends beyond memorizing facts. This approach aligns perfectly with how we integrate learning at The Music Scientist, where every activity has educational purpose and developmental value.
Sound waves are vibrations that travel through the air (or other materials) until they reach our ears. When your child plays an instrument in their Groovers class or claps to a rhythm, they’re creating sound waves that move outward in all directions. These waves have energy, and when they hit a surface like a wall or box, several things can happen: they can bounce back (reflection), pass through (transmission), or be absorbed (absorption).
Soundproofing materials work primarily through absorption. When sound waves enter a soft, porous material like cotton or fabric, the waves cause tiny fibers to vibrate. This vibration converts the sound energy into a small amount of heat energy, which is why the sound becomes quieter. Dense materials work differently—they reflect sound waves or simply have too much mass for the waves to easily pass through.
The best soundproofing typically combines different approaches. Professional recording studios, for example, use dense walls to block sound transmission, soft panels to absorb echoes, and textured surfaces to scatter sound waves. Your child’s experiment mimics these real-world applications on a smaller, more manageable scale.
For children who are learning about musical concepts like volume dynamics, this experiment provides concrete understanding of why a piano in a room with curtains and carpets sounds different than a piano in an empty room with hard floors. They’re learning that the environment affects sound just as much as the source itself—a sophisticated concept that enhances their musical appreciation.
Materials to Test and Compare
The variety of materials you test will determine how much children learn about different acoustic properties. Encourage your child to make predictions before testing each material, developing their scientific reasoning skills.
Soft and Fibrous Materials
Materials like cotton balls, felt, towels, and fabric typically perform well because their fibers trap air pockets, which disrupt sound wave travel. These materials excel at absorbing mid to high-frequency sounds. When testing these, children often discover that thicker applications work better than thin layers—introducing the concept that quantity matters in soundproofing effectiveness.
Dense and Heavy Materials
Cork, rubber, and multiple layers of cardboard work through mass and density. They don’t absorb sound as much as they block it from passing through. These materials are particularly effective for low-frequency sounds. Testing these alongside soft materials helps children understand that different materials work in different ways.
Textured and Irregular Surfaces
Egg cartons are popular for soundproofing experiments because their irregular surface scatters sound waves in multiple directions, preventing them from bouncing back in an organized way. Crumpled newspaper works similarly. These materials teach children that shape and structure matter, not just material composition.
Air-Filled Materials
Bubble wrap and foam contain trapped air, which creates barriers that sound must travel through. Each time sound passes from one medium to another (from air to plastic to air to plastic), some energy is lost. Testing these materials demonstrates that structure creates soundproofing opportunities.
For children enrolled in our SMART-START English programme, this variety of materials also provides language learning opportunities. They can practice descriptive vocabulary: soft, hard, thick, thin, smooth, bumpy, flexible, rigid. Science becomes a platform for language development, just as our curriculum uses music to teach literacy skills.
How to Record and Present Your Results
Proper documentation transforms a simple experiment into a complete scientific investigation. This process teaches children that science isn’t just about doing experiments—it’s also about communicating findings clearly so others can learn from and verify your work.
Creating a Data Table
Help your child organize their measurements in a simple table. The first column should list each material tested (including “Empty Box” as the control). The second column records the decibel reading. A third column can show the difference from the control (“5 decibels quieter than empty box”). Even young children can participate in creating this table, developing early data organization skills that support mathematical thinking.
Making a Bar Graph
Visual representation helps children see patterns more clearly. Create a simple bar graph where each material gets a bar showing its decibel reading. Shorter bars represent quieter results (better soundproofing). Children can color-code materials by type (soft materials in blue, dense materials in red, etc.) to identify patterns. This connects to the logical-mathematical intelligence we develop through our music programmes, where children learn to recognize and create patterns.
Taking Photos
Document each stage of your experiment with photos: the empty box, each material being installed, the testing setup, and the final results display. These images will be invaluable for creating your STEM fair presentation board and help younger children remember and explain what they did.
Writing Observations
Beyond numbers, encourage your child to write qualitative observations. Did the cotton balls make the sound muffled? Did the egg cartons make it echo differently? These descriptive observations develop verbal-linguistic intelligence and help children articulate what they experienced, a skill we nurture in all our programmes at The Music Scientist.
Connecting Sound Science to Music Learning
For families whose children participate in music enrichment programmes, this project offers wonderful opportunities to deepen musical understanding. At The Music Scientist, we believe that music education and general learning are deeply interconnected, each enhancing the other. The soundproofing box experiment perfectly illustrates this integration.
When children in our Tenderfeet infant care classes or Happyfeet toddler classes experience sensory play with different textures and sounds, they’re building neural pathways that support both musical and scientific thinking. The soundproofing experiment extends this sensory exploration, allowing older children to investigate sound in a more analytical way while still engaging their senses.
Consider discussing these connections with your child: Why do concert halls have special wall coverings? How do recording studios create clear sound? Why does singing in the bathroom sound different than singing outside? These questions bridge their musical experiences with scientific inquiry, showing that music isn’t separate from science—it’s applied physics that we can hear and feel.
The experiment also reinforces concepts like volume dynamics (forte and piano in musical terms), timbre (how materials change the quality of sound, not just the loudness), and acoustic environments (how space affects music). For children learning instruments or participating in group music classes, understanding these concepts cognitively enhances their practical musical development.
Tips for STEM Fair Success
Presenting your soundproofing box project at a STEM fair requires more than just conducting the experiment. These tips will help your child create a memorable, educational display that effectively communicates their scientific work.
Create an Interactive Display
If fair rules allow, bring your actual soundproofing box and materials so viewers can see and touch them. Create a “before and after” demonstration where people can hear the difference between the unlined box and the best soundproofing material you discovered. Interactive displays engage multiple senses and are more memorable than static presentations.
Develop a Clear Hypothesis Statement
Help your child articulate their hypothesis in simple terms: “I think soft, fluffy materials will block sound better than hard materials because they can trap the sound waves.” This statement shows scientific thinking and gives structure to their investigation. Even if the results don’t support the hypothesis, that’s valuable learning—science is about testing ideas, not always being right.
Practice the Explanation
Children should be able to explain their project in their own words without reading from a board. Practice with questions like: “What did you test?” “Why did you choose these materials?” “What surprised you about your results?” “How could someone use this information in real life?” This verbal rehearsal builds confidence and develops the communication skills that are essential for academic success and lifelong learning.
Include Real-World Applications
Help your child connect their experiment to real situations: noise-canceling headphones, quiet study spaces, soundproof practice rooms for musicians, or even how cars are designed to reduce road noise. These connections show that their project has relevance beyond the science fair, making the work feel meaningful and important.
Discuss Variables and Fair Testing
Be prepared to explain what stayed the same (controlled variables) and what changed (independent variable) in your experiment. Understanding variables demonstrates sophisticated scientific thinking. For this project: the independent variable is the soundproofing material, the dependent variable is the sound level measured, and controlled variables include the sound source, box size, and measurement distance.
Suggest Extensions for Future Research
Encourage your child to think about follow-up questions: “What would happen if I used a larger box?” “Would combining two materials work even better?” “Do different frequencies of sound (high notes versus low notes) get blocked differently?” This forward-thinking approach shows that scientific inquiry is an ongoing process, not a one-time event.
At The Music Scientist, we understand that children who develop confidence in presenting ideas—whether explaining a science project or performing music—build essential life skills. Our SMART-START Chinese programme and all our curriculum offerings emphasize building this confidence through supportive, developmentally appropriate challenges. A STEM fair project offers another wonderful opportunity for your child to practice these skills.
The soundproofing box test represents everything we love about quality early childhood education: it engages multiple senses, allows for hands-on discovery, produces immediate observable results, and connects to real-world applications that children can understand. More importantly, it builds confidence. When your child successfully conducts an experiment, records data, and presents findings, they experience themselves as capable learners—a self-image that will serve them throughout their educational journey.
This project naturally complements the holistic developmental approach that guides everything we do at The Music Scientist. Just as our programmes use music to develop cognitive, physical, social, and emotional skills simultaneously, a well-designed STEM project engages multiple intelligences and learning styles. Your child practices fine motor skills while handling materials, logical-mathematical thinking while recording data, linguistic abilities while explaining results, and kinesthetic learning through the hands-on experimentation process.
Whether your child is just beginning to explore the wonderful world of sound through our early childhood music classes or is ready for more advanced scientific thinking, the soundproofing box test can be adapted to their developmental level. The flexibility and accessibility of this project make it ideal for families who value learning experiences that are both educational and enjoyable—exactly the philosophy that guides our approach to music enrichment education in Singapore.
As you embark on this scientific adventure with your child, remember that the process matters more than perfection. The questions they ask, the observations they make, and the curiosity they develop are far more valuable than having the “best” project at the fair. Science, like music, is fundamentally about exploration, expression, and discovering new ways to understand the world around us. Enjoy this learning journey together!
Nurture Your Child’s Love for Learning Through Music
At The Music Scientist, we combine music, movement, and sensory play to develop cognitive skills, creativity, and confidence in children aged 4 to 47 months. Our developmentally-focused programmes integrate science concepts, early literacy, and musical education to prepare your child for lifelong learning success.
Table Of Contents
- What Is a Theremin and Why Build One?
- Educational Benefits of Building Musical Instruments
- What You’ll Need for Your DIY Theremin
- Understanding How Capacitive Sensing Creates Sound
- Step-by-Step: Building Your Arduino Theremin
- Programming the Arduino Nano
- Troubleshooting Common Issues
- Creative Ways to Extend the Project
- Connecting DIY Instruments to Music Education
There’s something magical about creating sound through movement alone, without ever touching an instrument. The theremin, one of the earliest electronic instruments, does exactly that. By building a DIY theremin using copper wire and Arduino Nano, you’re not just crafting a fascinating musical device; you’re exploring the intersection of electronics, physics, music, and creative expression.
This hands-on project offers a wonderful opportunity to understand how technology and music work together. Whether you’re a parent looking to introduce STEM concepts through creative making, an educator seeking interactive classroom projects, or simply someone curious about electronic music, building a theremin provides tangible learning experiences that engage multiple ways of thinking. The process combines logical problem-solving with artistic experimentation, kinesthetic building with auditory feedback, making it an ideal project for exploring how different types of intelligence work together.
In this guide, we’ll walk through everything you need to know to build your own functioning theremin, from understanding the science behind capacitive sensing to programming your Arduino and troubleshooting common challenges. You’ll discover how this simple circuit translates hand movements into musical tones, and how building musical instruments can deepen appreciation for both technology and sound.
What Is a Theremin and Why Build One?
The theremin is a unique electronic musical instrument invented in 1920 by Russian physicist Léon Theremin. Unlike traditional instruments, it’s played without physical contact. Musicians move their hands near two metal antennas to control pitch and volume, creating ethereal, haunting sounds often heard in science fiction films and experimental music. The original theremin uses radio frequency oscillators and heterodyning principles to detect hand position through electromagnetic fields.
Our DIY version uses a more accessible approach called capacitive sensing. When you bring your hand near copper wire connected to the Arduino, you change the electrical capacitance of the circuit. The Arduino detects these tiny changes and converts them into different audio frequencies, creating a theremin-like effect. While simpler than the original design, this approach maintains the core experience of gesture-controlled music making and provides an excellent introduction to sensors, microcontrollers, and sound synthesis.
Building a theremin from scratch offers something unique: the satisfaction of creating an instrument you can actually play. The process demystifies electronic music, showing that complex sounds emerge from understandable physical principles. For learners of all ages, this tangible connection between cause and effect (hand movement creates pitch change) makes abstract concepts like capacitance and frequency suddenly concrete and meaningful.
Educational Benefits of Building Musical Instruments
Creating your own musical instruments bridges multiple learning domains in ways that isolated lessons rarely achieve. When you build a theremin, you’re simultaneously engaging with electronics, programming, physics, mathematics, and musical expression. This integration mirrors how real-world innovation happens, where disciplines overlap and inform each other.
From a developmental perspective, projects like this activate several types of intelligence at once. Logical-mathematical intelligence comes into play as you work through circuit connections and troubleshoot programming issues. Musical intelligence develops as you experiment with the sounds you create and begin to understand relationships between frequency and pitch. Kinesthetic intelligence engages through the physical assembly process and the gesture-based playing technique. Even verbal-linguistic intelligence strengthens as you learn new technical vocabulary and explain your creation to others.
This multifaceted approach aligns with how young learners naturally explore their world. Just as programs like Scouts: Fostering A Love for Science through Catchy Melodies use music to make scientific concepts memorable and engaging, building electronic instruments uses hands-on creation to make technology accessible and exciting. The immediate feedback loop (change something, hear a different sound) provides the kind of responsive learning environment that builds confidence and encourages experimentation.
Beyond specific skills, DIY instrument projects cultivate an important mindset: the understanding that technology isn’t mysterious or off-limits, but something you can understand, modify, and create with. This sense of agency and creative capability becomes increasingly valuable as technology continues shaping our world.
What You’ll Need for Your DIY Theremin
Before starting your build, gather these components. Most are readily available from electronics retailers, online marketplaces, or specialty maker supply stores:
- Arduino Nano – The microcontroller brain of your theremin; any Arduino Nano compatible board works
- Copper wire – Approximately 1-2 meters of solid or stranded copper wire (18-22 gauge works well); this becomes your antenna
- 1 megohm resistor – A high-value resistor essential for capacitive sensing
- Piezo buzzer or small speaker – For sound output; passive buzzers work best
- Breadboard – For prototyping without soldering (optional but recommended for beginners)
- Jumper wires – For making connections between components
- USB cable – To program the Arduino and provide power
- Computer with Arduino IDE installed – Free software for programming your Arduino
- Optional: Cardboard or wood base – For mounting components in a more permanent, playable configuration
The total cost typically ranges from $15-30 if you’re starting from scratch, making this an accessible entry point into electronic music creation. If you already have an Arduino and basic components, you might only need the copper wire and resistor. The beauty of this project lies in its simplicity: with just a few components, you’ll create something genuinely musical and interactive.
Understanding How Capacitive Sensing Creates Sound
To appreciate what you’re building, it helps to understand the science behind it. Capacitive sensing detects changes in electrical capacitance, which is essentially the ability of a system to store electrical charge. When your hand approaches the copper wire antenna, you become part of the electrical system. Your body has its own capacitance, and as you move closer, the total capacitance of the circuit changes.
The Arduino measures these changes by charging and discharging the sensing wire through the resistor many times per second. When capacitance increases (hand moves closer), it takes longer to charge, which the Arduino can time with precision. This timing data gets converted into numbers representing distance, which the program then maps to audio frequencies. Higher numbers (hand closer) might produce higher pitches, while lower numbers (hand farther) produce lower tones.
Frequency determines the pitch we hear. Sound waves are vibrations in the air, and when those vibrations happen more rapidly (higher frequency), we perceive a higher pitch. The Arduino generates these frequencies by turning the buzzer on and off extremely quickly. A frequency of 440 times per second (440 Hz) produces the musical note A, while 880 Hz produces an A one octave higher. By continuously adjusting this frequency based on hand position, your theremin creates a smooth, playable range of pitches.
This principle of translating physical proximity into sound has applications far beyond musical instruments. Capacitive sensing powers touchscreen phones, proximity sensors in cars, and interactive art installations. Understanding it through a playful music project makes an abstract concept tangible and memorable.
Step-by-Step: Building Your Arduino Theremin
Now for the exciting part: assembling your theremin. Take your time with each step, double-checking connections before moving forward. Electronics projects reward patience and careful attention.
1. Set up your workspace – Find a clean, well-lit surface to work on. Organize your components where you can easily reach them. Make sure your computer is nearby with the Arduino IDE software already installed and ready to use.
2. Prepare the copper wire antenna – Take your copper wire and shape it into a simple antenna. A straight length of 20-30 cm works fine, or you can coil it into a spiral for a more compact design. The key is that one end needs to connect to your circuit while the other end extends into the air where your hand can approach it without touching. If using a base, secure the wire so it stands vertically or at an angle.
3. Insert the Arduino Nano into the breadboard – Place your Arduino Nano across the center divide of the breadboard so the pins on each side are in separate rows. This allows you to make connections to each pin. Ensure it’s firmly seated but not forced.
4. Connect the sensing resistor – Insert one leg of the 1 megohm resistor into the breadboard row connected to Arduino pin D2. Insert the other leg into the row connected to pin D4. This resistor bridges these two pins and enables the capacitive sensing technique. The resistor has no polarity, so either orientation works.
5. Attach the copper antenna – Connect one end of your prepared copper wire to the same breadboard row as Arduino pin D2 (where one end of the resistor connects). This is your touch-sensitive antenna. Make sure the connection is secure, as a loose wire will cause erratic behavior.
6. Connect the piezo buzzer – The buzzer typically has two leads, one marked positive (often red or marked with a ‘+’) and one negative (often black or unmarked). Connect the positive lead to Arduino pin D8 and the negative lead to a GND (ground) pin on the Arduino. If your buzzer isn’t marked, try one orientation first, and if it doesn’t work, reverse it.
7. Verify all connections – Before powering anything on, visually trace each connection against these instructions. Check that the resistor bridges D2 to D4, the antenna connects to D2, and the buzzer connects to D8 and GND. Loose connections are the most common cause of issues, so ensure everything is firmly in place.
8. Connect the Arduino to your computer – Use the USB cable to connect the Arduino Nano to your computer. The Arduino should power on, indicated by a small LED lighting up on the board. Your computer should recognize the device. If it’s your first time using this Arduino, you may need to install drivers (check the Arduino website for guidance).
With the physical build complete, you’re ready to bring your theremin to life with programming.
Programming the Arduino Nano
The Arduino needs instructions to read the capacitive sensor and produce sound. This is where the magic happens: translating sensor data into musical tones. Open the Arduino IDE on your computer and create a new sketch.
You’ll need to install the CapacitiveSensor library first. In the Arduino IDE, go to Sketch > Include Library > Manage Libraries. Search for “CapacitiveSensor” and install the library by Paul Badger and Paul Stoffregen. This library handles the complex timing measurements needed for capacitive sensing.
Here’s the basic code structure for your theremin:
#include <CapacitiveSensor.h> CapacitiveSensor sensor = CapacitiveSensor(4, 2); int buzzerPin = 8; void setup() { pinMode(buzzerPin, OUTPUT); Serial.begin(9600); } void loop() { long sensorValue = sensor.capacitiveSensor(30); int frequency = map(sensorValue, 0, 1000, 200, 1000); frequency = constrain(frequency, 200, 1000); if (sensorValue > 50) { tone(buzzerPin, frequency); } else { noTone(buzzerPin); } Serial.println(sensorValue); delay(10); } Let’s break down what this code does. The CapacitiveSensor object creates a sensor using pins 4 and 2 (the pins your resistor bridges). In the setup function, we configure the buzzer pin as an output and start serial communication so you can monitor sensor values. The loop function runs continuously: it reads the sensor value, maps that value to a frequency range (200-1000 Hz), and plays that frequency on the buzzer if the sensor detects something nearby.
The map function is particularly important. It takes the sensor reading (which might range from 0 to several thousand) and converts it to a musical frequency between 200 and 1000 Hz. You can adjust these numbers to change your theremin’s pitch range. Lower numbers create deeper sounds, while higher numbers create higher pitches.
After entering this code, click the checkmark icon to verify (compile) it, then click the arrow icon to upload it to your Arduino. Select the correct board (Arduino Nano) and port in the Tools menu if you haven’t already. Once uploaded, your theremin should start working immediately. Move your hand near the copper antenna and listen for the pitch to change.
Troubleshooting Common Issues
Even with careful assembly, you might encounter some challenges. Here are solutions to the most common problems:
No sound at all: First, check that your buzzer is connected properly, with positive to D8 and negative to GND. Try reversing the buzzer connections if you’re uncertain about polarity. Open the Serial Monitor in the Arduino IDE (Tools > Serial Monitor) to see if the sensor is producing values. If you see numbers changing when you move your hand near the antenna, the sensing works and the problem is with the buzzer circuit. If you see no values or strange characters, check your baud rate setting in the Serial Monitor (should be 9600).
Constant tone that doesn’t change: This usually indicates the sensor isn’t detecting your hand movements. Verify that the 1 megohm resistor is properly connected between pins D2 and D4. Check that the antenna wire connects to D2. Make sure you’re using a high-value resistor (1 megohm or higher). Lower resistance values won’t provide the sensitivity needed for this project.
Very jittery or unstable sound: Increase the second parameter in the capacitiveSensor(30) function to a higher number like 50 or 100. This averages more samples, creating smoother readings. You might also try adding a small delay or using a longer antenna, which increases sensitivity. Environmental electrical noise can also cause instability, so try moving away from large metal objects or power supplies.
Range is too small or too large: Adjust the mapping values in your code. If the theremin only responds when your hand is extremely close, your antenna might be too short or your sensor readings are low. Try a longer piece of wire or adjust the map function’s input range. Check the Serial Monitor to see what values your sensor actually produces, then adjust the first two parameters of the map function accordingly.
Remember that capacitive sensing can be affected by humidity, nearby objects, and even what you’re wearing. Experimentation and adjustment are part of the learning process. Each challenge you solve deepens your understanding of how the system works.
Creative Ways to Extend the Project
Once your basic theremin works, numerous possibilities open up for customization and expansion. These extensions can make your instrument more musical, more visually engaging, or more technically sophisticated.
Add LED visual feedback: Connect an LED to another Arduino pin with an appropriate resistor (220 ohm works well). Program the LED’s brightness to change with pitch, creating a visual representation of your playing. This adds a kinesthetic-visual connection that reinforces the relationship between hand position and sound. You could even add multiple LEDs that light up in sequence as pitch increases, creating a colorful display.
Create multiple antennas: Add a second copper wire antenna on different pins to control volume or create two-note harmonies. This moves closer to the original theremin design, which used two antennas for independent pitch and volume control. You’ll need another high-value resistor and some code modifications, but the result is a much more expressive instrument.
Build an enclosure: Design and construct a housing for your theremin using cardboard, wood, or even 3D printing. A well-designed case not only protects the electronics but makes the instrument easier to play and more aesthetically appealing. You might create a retro-futuristic design reminiscent of vintage synthesizers, or something colorful and playful. The physical design process itself offers learning opportunities in craftsmanship, ergonomics, and aesthetics.
Experiment with sound synthesis: Instead of simple tones, program more complex waveforms or add effects. You could implement vibrato, create arpeggiating patterns, or even trigger different sounds at different distance ranges. Libraries like the Mozzi synthesis library open up sophisticated audio capabilities for the Arduino, though they require more advanced programming.
Connect to a computer: Send MIDI data from the Arduino to music production software on your computer, allowing you to play software synthesizers with your theremin gestures. This transforms your simple circuit into a controller for unlimited sounds. Projects like this demonstrate how hardware and software work together in modern music technology.
These extensions aren’t just technical exercises. They represent the kind of iterative improvement and creative problem-solving that characterizes both good engineering and artistic expression. Each modification requires thinking through cause and effect, testing ideas, and refining based on results.
Connecting DIY Instruments to Music Education
Building electronic instruments offers a different but complementary path to music education alongside traditional instrumental instruction. When children or adults create their own sound-making devices, they develop an intimate understanding of how music works from the inside out. They’re not just learning to play someone else’s instrument; they’re learning to think like instrument designers, sound engineers, and innovative musicians.
This maker approach to music aligns beautifully with developmentally-focused learning principles. Just as early childhood programs use music to develop multiple intelligences simultaneously, DIY instrument projects engage learners on several levels at once. The physical construction develops fine motor skills and spatial reasoning. The programming challenges logical thinking and sequential problem-solving. The sound experimentation encourages musical ear development and creative expression. And sharing the finished instrument with others builds communication skills and confidence.
For young children not yet ready for complex electronics, the principles still apply. Simple sound-making projects using everyday materials (rubber band guitars, water bottle flutes, rice shakers) provide similar multisensory learning experiences. Programs like Groovers: Music and Dance Classes for Toddlers incorporate movement-based music activities that build the same body-sound awareness that playing a theremin develops, just at an age-appropriate level.
As children progress through developmental stages, their capacity for understanding complex relationships grows. The toddler shaking a homemade rattle explores cause and effect. The preschooler in programs like SMART-START English begins connecting sounds to patterns and meanings. The school-age child building a theremin integrates abstract concepts about electricity, waves, and frequency. Each stage builds on the previous, creating a continuum of increasingly sophisticated music-making and understanding.
The theremin project also exemplifies how technology can make music more accessible. Traditional instruments require years of practice to produce pleasant sounds. A theremin, in contrast, creates interesting tones immediately, even for complete beginners. This low barrier to entry combined with high creative potential makes it an ideal gateway instrument. Success comes quickly enough to maintain motivation, while mastery requires the same kind of dedicated practice and musical sensitivity that any instrument demands.
Parents and educators looking to foster musical development have many approaches available. Formal instruction, exploratory play, listening experiences, and creative making all contribute valuable dimensions to musical understanding. Projects like this theremin build demonstrate that music education isn’t just about learning to play existing instruments. It’s about developing a relationship with sound itself—understanding it, manipulating it, and using it for expression and communication.
Building a DIY theremin using copper wire and an Arduino Nano provides far more than just an interesting afternoon project. It opens a window into the fascinating overlap between music, technology, and creative expression. Through the simple act of assembling a few electronic components and writing some code, you’ve created something genuinely musical—an instrument that responds to your gestures and produces sounds you can control and shape.
The skills developed through this project extend well beyond the specific knowledge of capacitive sensing or Arduino programming. You’ve practiced following complex instructions, troubleshooting problems systematically, and iterating toward improvement. You’ve experienced how abstract concepts become concrete when you build something with your own hands. Most importantly, you’ve seen that making music doesn’t require traditional instruments or years of lessons. With curiosity, basic materials, and willingness to experiment, anyone can become both a musician and an instrument maker.
Whether you’re introducing children to STEM concepts through creative projects, exploring new ways to make music yourself, or simply enjoying the satisfaction of building something unique, the theremin project embodies an important principle: learning happens most powerfully when we engage multiple ways of knowing simultaneously. Logic, creativity, physical skill, and sensory awareness all work together, just as they do in the best educational experiences.
As you continue exploring the intersection of music and making, remember that every great innovation starts with curiosity and experimentation. Your simple theremin represents the same spirit of creative problem-solving that drives both artistic expression and technological advancement. Keep building, keep experimenting, and keep discovering new ways to make sound.
Looking for music education programs that develop multiple intelligences through engaging, developmentally-appropriate activities? The Music Scientist offers specialized enrichment classes for babies, toddlers, and preschoolers that integrate music, movement, and learning. From Tenderfeet sensory development classes for infants to Happyfeet toddler enrichment and preschool readiness programs, we combine originally composed music with general knowledge themes to nurture young minds. Contact us today to learn how music can unlock your child’s learning potential.
Table Of Contents
- What Is MIDI and Why Does It Matter?
- Python as Your Musical Programming Language
- Getting Started: Setting Up Your Environment
- Creating Your First MIDI Program
- Educational Applications for Young Learners
- Building Interactive Music Learning Tools
- Connecting Music Programming to Cognitive Development
- Next Steps in Your MIDI and Python Journey
Music and technology have always shared a profound connection, but in today’s digital age, that relationship has evolved into something extraordinary. Whether you’re a music educator looking to create custom learning tools, a parent interested in innovative ways to engage your child with music, or simply curious about the intersection of coding and creativity, understanding MIDI (Musical Instrument Digital Interface) and Python programming opens up remarkable possibilities.
At The Music Scientist, we believe that music serves as a powerful learning medium that nurtures young minds across multiple intelligences. When we combine music with programming, we create opportunities to develop not just musical and rhythmic intelligence, but also logical-mathematical thinking, problem-solving skills, and creative expression. This introduction to MIDI and Python will guide you through the fundamentals of music programming, showing you how to transform musical ideas into interactive digital experiences.
In this comprehensive guide, you’ll discover what MIDI is and how it works, why Python is an ideal language for music programming, and how to create your first programs that generate melodies, respond to musical input, and create interactive learning experiences. Whether you’re building educational tools for early childhood music programs or exploring new ways to understand music theory, this journey into coding chords will equip you with foundational knowledge and practical skills.
What Is MIDI and Why Does It Matter?
MIDI, which stands for Musical Instrument Digital Interface, is a technical standard that describes a communication protocol, digital interface, and electrical connectors that allow electronic musical instruments, computers, and other devices to connect and communicate with each other. Unlike audio recordings that capture sound waves, MIDI transmits event messages about musical notation, pitch, velocity, timing, and control signals.
Think of MIDI as a universal language for music technology. When you press a key on a MIDI keyboard, it doesn’t send the actual sound of that note. Instead, it sends a message that says “Note C4 was pressed with this velocity at this time.” The receiving device then interprets that message and produces sound accordingly. This fundamental distinction makes MIDI incredibly powerful for music education and interactive learning experiences.
For educators and parents, MIDI offers several compelling advantages. First, MIDI files are extremely small compared to audio files, making them perfect for educational apps and interactive tools. Second, MIDI data is completely editable. You can change the tempo, transpose the key, or modify individual notes without any loss in quality. Third, MIDI enables real-time interaction, allowing programs to respond immediately to musical input, which is essential for creating engaging learning experiences for young children.
In early childhood music education, these capabilities translate into powerful applications. Imagine creating a program that listens to a child playing simple melodies and provides visual feedback, or developing interactive games that help toddlers understand rhythm patterns through cause-and-effect relationships. MIDI makes all of this possible, and Python provides the tools to bring these ideas to life.
Python as Your Musical Programming Language
Python has emerged as one of the most accessible and powerful programming languages for music applications. Its clear, readable syntax makes it ideal for beginners, while its extensive library ecosystem provides professional-grade tools for advanced projects. For music educators and creative technologists, Python strikes the perfect balance between ease of use and capability.
The language’s philosophy emphasizes code readability and simplicity, which means you can focus on musical concepts rather than getting lost in complex programming syntax. When you’re creating educational tools or interactive music experiences, this clarity becomes invaluable. You can iterate quickly, test ideas efficiently, and maintain your code easily over time.
Several Python libraries make working with MIDI straightforward and intuitive. The most popular include Mido for MIDI message handling, python-rtmidi for real-time MIDI input and output, and Music21 for more advanced music theory operations. These libraries handle the technical complexity of MIDI communication, allowing you to concentrate on creating meaningful musical interactions.
What makes Python particularly relevant for music education is its versatility. The same language that controls MIDI instruments can also create graphical interfaces, process data, generate reports, and even integrate with web applications. This means you can build comprehensive educational systems that combine music generation, visual feedback, progress tracking, and parent communication all within a single programming environment.
Getting Started: Setting Up Your Environment
Before you can start coding musical interactions, you’ll need to set up your programming environment. Don’t worry if you’re new to programming. The setup process is straightforward, and once completed, you’ll have a powerful toolkit for music creation and education.
What You’ll Need
- Python Installation: Download Python 3.8 or newer from python.org (the official Python website provides installers for Windows, Mac, and Linux)
- Code Editor: Visual Studio Code, PyCharm, or any text editor you’re comfortable with
- MIDI Library: Mido, which you’ll install using Python’s package manager
- Optional MIDI Device: A USB MIDI keyboard or controller (though you can start without one using virtual instruments)
- Virtual Instrument: A software synthesizer like FluidSynth or your computer’s built-in MIDI sounds
Installation Steps
1. Install Python by downloading the installer from python.org and following the installation wizard. Make sure to check the box that says “Add Python to PATH” during installation, as this allows you to run Python from any command prompt or terminal window.
2. Open your command prompt or terminal and verify Python is installed correctly by typing “python –version” or “python3 –version.” You should see the version number displayed, confirming successful installation.
3. Install the Mido library by entering the command “pip install mido” in your terminal. Pip is Python’s package installer, and it will automatically download and install Mido along with its dependencies. This process typically takes just a minute or two.
4. Install python-rtmidi for real-time MIDI capabilities by typing “pip install python-rtmidi” in your terminal. This library enables your programs to send and receive MIDI messages in real time, which is essential for interactive applications.
5. Test your installation by opening Python and typing “import mido” followed by “print(mido.get_output_names()).” If you see a list of available MIDI outputs (even if empty), your setup is working correctly.
Creating Your First MIDI Program
Now comes the exciting part: writing code that actually makes music. Your first program will be simple but powerful. It will create a MIDI file containing a basic melody that you can play back on any device. This foundational exercise demonstrates the core concepts you’ll use in more complex projects.
Let’s create a program that generates a simple five-note melody using the C major scale. This melody is similar to the patterns young children encounter in early music education programs like our Tenderfeet classes, where simple, repetitive patterns help develop auditory processing and memory skills.
Here’s your first program:
import mido from mido import Message, MidiFile, MidiTrack # Create a new MIDI file and add a track midi_file = MidiFile() track = MidiTrack() midi_file.tracks.append(track) # Define our simple melody (C, D, E, F, G) notes = [60, 62, 64, 65, 67] # MIDI note numbers # Add notes to the track for note in notes: track.append(Message('note_on', note=note, velocity=64, time=0)) track.append(Message('note_off', note=note, velocity=64, time=480)) # Save the MIDI file midi_file.save('my_first_melody.mid') print("Melody created successfully!")Let’s break down what this code does. The import statements bring in the tools you need from the Mido library. You then create a new MIDI file object and add a track to it (MIDI files can contain multiple tracks, like different instruments in an orchestra). The notes list contains MIDI note numbers, where 60 represents middle C, 62 is D, and so on.
The loop adds each note to the track with two messages: note_on (when the note starts) and note_off (when it stops). The velocity parameter controls how loudly the note plays (0 to 127), while the time parameter determines the duration in MIDI ticks. Finally, the program saves your creation as a standard MIDI file that any music software can open and play.
Understanding MIDI Note Numbers
MIDI represents pitches as numbers from 0 to 127, with middle C (C4) assigned the value 60. Each number increase represents one semitone or half-step. This numerical representation makes it easy to transpose melodies, create scales programmatically, and teach interval relationships. For young learners, you can create programs that visualize these relationships, connecting the abstract concept of pitch to concrete numbers and patterns.
Educational Applications for Young Learners
The intersection of MIDI programming and early childhood education offers remarkable opportunities to enhance learning experiences. When we apply programming skills to music education, we can create customized tools that address specific developmental goals and learning styles, supporting the multiple intelligences approach that The Music Scientist emphasizes in programs like Happyfeet and Groovers.
Interactive rhythm games represent one powerful application. You can create programs that play rhythm patterns and then listen for the child to clap or tap the pattern back on a MIDI pad. The program analyzes the timing accuracy and provides encouraging feedback, building rhythmic awareness and auditory memory. This type of interactive feedback loop engages kinesthetic learners while developing temporal processing skills.
Melodic pattern recognition tools help develop pitch awareness and musical memory. Your program might play three notes, then ask the child to identify whether a fourth note goes “up” or “down.” As the child progresses, the intervals can become more challenging. This scaffolded approach mirrors developmentally appropriate teaching methods, gradually building skills from simple to complex.
Composition assistants for young children can transform random key presses into musical phrases that follow specific scales or chord progressions. When a toddler bangs on a MIDI keyboard, the program can map those inputs to notes within a pentatonic scale, ensuring everything sounds harmonious. This removes the frustration of “wrong notes” and allows even the youngest children to experience the joy of creating pleasing music.
Perhaps most importantly, these tools can integrate with broader educational themes. Just as our Scouts program fosters a love for science through catchy melodies, MIDI programs can teach colors, numbers, animals, or any concept by associating them with specific sounds, melodies, or musical responses. The programmatic control that Python provides means these educational connections can be precisely designed to support curriculum goals.
Building Interactive Music Learning Tools
Moving beyond simple melody generation, interactive tools that respond to musical input open up new dimensions of engagement and learning. These real-time applications create cause-and-effect relationships that are particularly powerful for cognitive development in young children.
A real-time note listener is an excellent next project. This program monitors MIDI input from a keyboard or controller and responds immediately. For example, when a child plays middle C, the program might display a picture of a cat and play a “meow” sound. Each note on the keyboard could trigger different images and sounds, creating a multimedia learning experience that engages visual, auditory, and kinesthetic learning channels simultaneously.
Here’s a simplified example of how such a program might work:
import mido # Open a MIDI input port with mido.open_input() as inport: print("Listening for MIDI input...") for message in inport: if message.type == 'note_on' and message.velocity > 0: note = message.note # Respond to specific notes if note == 60: # Middle C print("You played C! That's the note for 'cat'") elif note == 62: # D print("You played D! That's the note for 'dog'") elif note == 64: # E print("You played E! That's the note for 'elephant'") # This is where you'd trigger sounds, images, etc.This simple framework can be expanded dramatically. You might add graphical interfaces using libraries like Pygame or Tkinter, incorporate animation, track progress over time, or adjust difficulty based on the child’s performance. The key is that Python handles the logic while MIDI provides the musical interaction layer.
Adaptive learning systems represent another frontier. Your program can monitor which notes or patterns a child struggles with and automatically provide more practice in those areas. It can celebrate successes with rewarding musical flourishes and gentle visual feedback. This type of personalized learning aligns perfectly with developmentally focused education, meeting each child where they are and supporting their individual growth trajectory.
Connecting Music Programming to Cognitive Development
The educational power of MIDI and Python extends far beyond music skills. When children interact with programmed musical systems, they’re developing crucial cognitive abilities that support learning across all domains. Understanding these connections helps educators and parents design more effective learning experiences.
Cause-and-effect understanding forms a foundational cognitive skill that develops throughout early childhood. Interactive MIDI programs provide immediate, consistent feedback: press this key, hear that sound; play this pattern, see this response. This clear relationship helps young minds grasp that their actions have predictable consequences, a concept that underlies logical thinking and scientific reasoning.
Pattern recognition and prediction skills develop naturally through musical programming applications. When a program plays a rhythmic or melodic pattern and asks the child to continue it, or when it establishes rules about how sounds relate to actions, children learn to identify patterns, make predictions, and test hypotheses. These are the same cognitive processes used in mathematical thinking and problem-solving.
Memory and attention receive powerful support from musical interactions. Programs that ask children to remember and reproduce melodies, recognize repeated themes, or notice when something changes all strengthen working memory and sustained attention. The engaging nature of musical feedback helps maintain focus longer than passive listening activities.
The integration of music and programming also supports sequential thinking and temporal processing. Music unfolds in time, and programming involves step-by-step logical sequences. When children engage with programmed musical systems, they practice understanding and creating ordered sequences, which supports literacy development, mathematical reasoning, and executive function skills. These cognitive foundations are essential for school readiness, which is why programs like our SMART-START English and SMART-START Chinese preschool readiness programs emphasize musical learning alongside traditional academic preparation.
Next Steps in Your MIDI and Python Journey
You’ve now been introduced to the fundamental concepts of MIDI programming with Python. You understand what MIDI is, how Python can control musical interactions, and how these tools can enhance music education and cognitive development. But this is just the beginning of what’s possible.
As you continue exploring, consider expanding your skills in several directions. Learn more advanced MIDI concepts like continuous controllers (which handle things like volume and expression), program changes (which switch instrument sounds), and system exclusive messages (which allow device-specific control). Each of these opens new creative possibilities.
Explore additional Python libraries that complement MIDI work. Libraries like NumPy and SciPy enable audio signal processing, Matplotlib creates visualizations of musical data, and Pygame builds complete interactive applications with graphics and sound. The Python ecosystem is vast, and you can continually add new capabilities to your toolkit.
Study music theory to inform your programming projects. Understanding scales, chords, harmony, and rhythm at a deeper level allows you to create more musically sophisticated and educationally valuable applications. The Music21 library, in particular, provides extensive music theory functionality that can analyze, generate, and transform musical structures.
Most importantly, experiment and create. The best way to learn programming is by building projects that genuinely interest you. Whether you want to create teaching tools for your classroom, develop games for your children, or simply explore the creative intersection of music and code, each project will deepen your understanding and expand your capabilities.
The combination of music and technology offers endless opportunities for innovation in education. As you develop your skills with MIDI and Python, you’re not just learning to code. You’re gaining the ability to create personalized learning experiences, design interactive tools that respond to individual needs, and explore new ways of teaching and learning that weren’t possible before. This is the future of music education, where technology serves human creativity and developmental growth.
Learning to code musical interactions with MIDI and Python opens remarkable possibilities for music education, creative expression, and cognitive development. Whether you’re an educator designing custom learning tools, a parent exploring innovative ways to engage your child with music, or simply someone curious about the intersection of technology and creativity, these skills empower you to transform musical ideas into interactive experiences.
The journey from understanding basic MIDI messages to building sophisticated educational applications is one of continuous discovery. Each program you write, each interaction you design, and each problem you solve deepens your understanding of both music and programming. More importantly, the tools you create can make meaningful differences in how children experience, understand, and love music.
At The Music Scientist, we believe that music serves as a powerful learning medium that nurtures young minds, builds confidence, and fosters curiosity. By combining music with programming, we extend these benefits into new realms, creating learning experiences that are personalized, responsive, and engaging. The technical skills you’ve begun developing today can enhance any music education program, support developmental goals across multiple intelligences, and help children build foundations for lifelong learning.
Ready to explore how music enhances cognitive development, builds confidence, and prepares young learners for success? Discover our developmentally-focused programs for babies, toddlers, and preschoolers. Contact us today to learn how The Music Scientist can support your child’s learning journey through the power of music.
Table Of Contents
- What Is Frequency and Why Does It Matter in Music Education?
- The Science Behind How Whistles Produce Sound
- 3D-Printed Whistle Project: Getting Started
- The Mathematics of Whistle Frequencies
- Educational Applications for Early Childhood Programs
- Creating Age-Appropriate Music Learning Tools
The intersection of technology, mathematics, and music offers fascinating opportunities for enriching early childhood education. While a 3D-printed whistle might seem like a simple object, it embodies complex principles of acoustics, frequency mathematics, and sound production that form the foundation of musical understanding. For educators and curriculum developers working with young learners, grasping these scientific concepts opens doors to creating more intentional, developmentally appropriate music experiences.
Understanding how whistles produce different pitches through mathematical relationships helps us appreciate why certain instruments and sounds naturally capture children’s attention and support their auditory development. This knowledge becomes particularly valuable when designing music enrichment programs that integrate STEM learning with artistic expression. Whether you’re an educator, parent, or maker interested in the science of sound, exploring the physics and mathematics behind a simple whistle reveals the beautiful complexity hidden within every musical note children encounter.
In this article, we’ll explore the frequency mathematics behind whistle design, walk through the considerations for creating a 3D-printed whistle project, and connect these concepts to practical applications in early childhood music education. By understanding the science, we can make more informed decisions about the instruments and sound-making tools we introduce to developing minds.
What Is Frequency and Why Does It Matter in Music Education?
Frequency refers to the number of sound wave cycles that occur per second, measured in Hertz (Hz). When an object vibrates 440 times per second, we hear the musical note A4, commonly used as a tuning reference in orchestras. This mathematical relationship between vibration rate and perceived pitch forms the foundation of all musical sound and is something even infants begin to process from their earliest days.
In early childhood music education, frequency manifests as the difference between high and low sounds. When we use whistles, bells, or drums in programs like Tenderfeet infant care classes, children’s brains are actively processing these frequency differences, developing neural pathways for auditory discrimination. Research shows that exposure to varied frequencies in musical contexts supports language development, as speech itself relies on perceiving different frequency patterns. The mathematical precision of these relationships exists whether we’re conscious of it or not, but understanding it allows educators to make deliberate choices about the sonic environments they create.
Pitch perception develops progressively throughout early childhood. Infants as young as four months can distinguish between different pitches, and by 18 months, toddlers begin matching pitch in their vocalizations. This developmental timeline means that the frequencies we expose children to during their formative years directly impact their musical and linguistic capabilities. A whistle producing a clear, consistent frequency provides a more effective learning tool than one with unstable or muddy tones, making the science behind whistle design relevant to anyone working in early childhood music enrichment.
The beauty of frequency as a concept is that it bridges the abstract world of mathematics with the tangible experience of sound. A child doesn’t need to understand Hertz to benefit from hearing a 1000 Hz whistle versus a 500 Hz one, but educators who understand these relationships can create more purposeful learning experiences that support multiple intelligences, including logical-mathematical and musical-rhythmic development.
The Science Behind How Whistles Produce Sound
Whistles create sound through a process called air reed mechanism, where moving air breaks into oscillating flows that excite a resonant cavity. When you blow into a whistle, the airstream passes over a sharp edge (called the fipple or windway), creating turbulence. This turbulent air alternately enters and bypasses the resonant chamber, setting up a standing wave inside the cavity. The frequency of this standing wave determines the pitch we hear.
The resonant cavity acts as an acoustic filter, amplifying certain frequencies while dampening others. This is similar to how organ pipes work, but whistles typically use a closed or semi-closed chamber rather than an open tube. The dimensions of this cavity, particularly its volume and the size of the opening, directly influence which frequencies resonate most strongly. This is why two whistles of different sizes produce different pitches even when blown with the same force.
Three primary factors determine a whistle’s frequency: cavity volume, opening size, and air velocity. Larger cavities generally produce lower frequencies because they allow longer wavelengths to form standing waves. Smaller openings can increase frequency by restricting airflow and changing the resonance characteristics. Air velocity affects the intensity and sometimes the stability of the tone, but within typical blowing ranges, the physical dimensions remain the dominant factors.
For educators implementing sensory play experiences in programs like Happyfeet classes for toddlers, understanding this mechanism explains why consistently manufactured whistles provide better learning tools than improvised ones. A well-designed whistle produces a stable, predictable frequency that helps children develop reliable auditory references. Inconsistent or poorly designed whistles may produce multiple competing frequencies or unstable tones that confuse rather than clarify pitch relationships.
3D-Printed Whistle Project: Getting Started
3D printing technology has democratized the creation of precisely calibrated musical instruments and sound-making tools. Unlike traditional whistle manufacturing that requires specialized equipment and materials, 3D printing allows educators and makers to experiment with different designs, test various frequencies, and create customized instruments for specific educational purposes. This accessibility makes it possible to develop instrument sets tailored to particular developmental stages or curriculum goals.
The ability to iterate quickly means you can test how small dimensional changes affect frequency output, providing hands-on learning about acoustics and mathematics. While the children in your program might be too young to operate the 3D printer themselves, the instruments created through this process can become valuable teaching tools. Additionally, for programs serving older preschoolers like those in Scouts science-focused classes, seeing the creation process can introduce early STEM concepts in an age-appropriate context.
What You’ll Need
- 3D Printer: FDM (Fused Deposition Modeling) printers work well for whistle projects; resolution of 0.2mm or finer produces adequate results
- Filament: PLA or PETG recommended for safety and ease of printing; PLA is food-safe when properly manufactured and produces good acoustic properties
- 3D Modeling Software: Free options like Tinkercad or Fusion 360 allow you to create or modify whistle designs
- Frequency Measurement Tool: Smartphone apps like “Spectroid” or “Tuner” help verify the actual frequency produced
- Calipers: Digital calipers ensure accurate measurement of cavity dimensions for mathematical calculations
- Sandpaper: Fine-grit sandpaper smooths rough edges that might affect airflow or pose safety concerns
- Design Files: Online repositories like Thingiverse offer starting templates that can be modified
Design Considerations for Different Frequencies
When designing a 3D-printed whistle, the goal is to create a resonant cavity with predictable acoustic properties. The fundamental design includes an air channel that directs breath across a sharp edge (the labium), with a chamber behind it that determines the resonant frequency. The relationship between these components follows acoustic principles that have been understood since the time of Helmholtz’s resonance research in the 19th century.
For higher frequencies (above 1000 Hz), design smaller cavities with volumes around 1-3 cubic centimeters. These produce bright, attention-grabbing sounds that work well for signaling activities or creating contrast in musical arrangements. Higher pitches also tend to cut through ambient noise more effectively, making them useful for group settings. However, extremely high frequencies can become uncomfortable, so staying within the 1000-2500 Hz range typically produces the most musically useful results for educational contexts.
For lower frequencies (300-800 Hz), increase the cavity volume to 5-15 cubic centimeters. These produce warmer, more mellow tones that many young children find less startling than high-pitched whistles. Lower frequencies also approximate the pitch range of human speech more closely, which may support the connection between musical and verbal learning. Programs focused on language development alongside music, such as SMART-START English programs, might particularly benefit from instruments in this frequency range.
The wall thickness of your printed whistle affects both durability and acoustic properties. Walls that are too thin (under 1.5mm) may flex during use, changing the cavity dimensions and destabilizing the frequency. Walls that are too thick add unnecessary weight without acoustic benefit. A wall thickness of 2-3mm provides a good balance for most whistle designs, ensuring the structure remains rigid enough to maintain consistent resonance.
The Mathematics of Whistle Frequencies
The mathematical relationship between whistle dimensions and produced frequency follows principles of acoustic resonance. While the complete physics involves complex fluid dynamics, we can use simplified formulas that provide reasonably accurate predictions for basic whistle designs. These approximations work well for educational purposes and initial design iterations, though fine-tuning typically requires empirical testing and adjustment.
Calculating Expected Frequency
For a simple Helmholtz resonator (the acoustic model closest to most whistle designs), the resonant frequency can be estimated using this formula:
f = (v / 2π) × √(A / (V × L))
In this equation, f represents frequency in Hertz, v is the speed of sound in air (approximately 343 meters per second at room temperature), A is the cross-sectional area of the opening in square meters, V is the cavity volume in cubic meters, and L is the effective length of the neck (opening channel) in meters.
Let’s work through a practical example. Suppose you want to design a whistle that produces a frequency around 1000 Hz, which is approximately two octaves above middle C and creates a clear, attention-grabbing tone suitable for transition signals in classroom settings. Starting with a cavity volume of 5 cubic centimeters (0.000005 cubic meters) and a neck length of 5 millimeters (0.005 meters), we need to determine the appropriate opening area.
Rearranging the formula to solve for area: A = (2πf)² × (V × L) / v². Substituting our values: A = (2π × 1000)² × (0.000005 × 0.005) / (343)². This yields approximately 0.0000135 square meters, or 13.5 square millimeters. For a circular opening, this corresponds to a diameter of about 4.1 millimeters.
This mathematical approach provides a starting point, but real-world factors including air turbulence, material properties, and manufacturing tolerances mean the actual frequency may vary by 10-20%. This is why testing with a frequency analyzer and making small dimensional adjustments becomes part of the design process. For educators, understanding this mathematical foundation helps explain why seemingly small changes in whistle design produce noticeable differences in pitch.
Understanding Cavity Resonance
Cavity resonance occurs when the physical dimensions of an enclosed or semi-enclosed space naturally amplify certain frequencies. This phenomenon is why singing in the shower sounds different from singing in a large room, and why acoustic guitars have hollow bodies. In a whistle, the cavity acts as a resonant chamber that selectively amplifies the frequency determined by its dimensions while dampening other frequencies.
The relationship between cavity size and resonant frequency is inverse: as volume increases, resonant frequency decreases. This follows from the physics of standing waves, where longer wavelengths (lower frequencies) require more physical space to establish stable oscillation patterns. Mathematically, if you double the cavity volume while keeping other factors constant, the frequency decreases by approximately 1.4 times (the square root of 2), not by half. This non-linear relationship means that creating whistles across a musical scale requires careful calculation rather than simple proportional scaling.
Multiple modes of resonance can exist within a single cavity, producing what acousticians call overtones or harmonics. A well-designed whistle emphasizes the fundamental frequency (the lowest resonant mode) while minimizing higher harmonics that can create harsh or unclear tones. The shape of the cavity influences which harmonics are prominent. Spherical or cylindrical cavities tend to produce cleaner fundamental tones than irregular shapes, making them better choices for educational instruments where pitch clarity supports learning.
Temperature also affects frequency, though the effect is relatively small. As temperature increases, the speed of sound increases, which slightly raises the resonant frequency. For typical indoor temperature variations (18-25°C), this effect changes frequency by only 1-2%, usually imperceptible to young learners. However, it’s worth noting when conducting precise acoustic experiments or when instruments are used in varying environments.
Educational Applications for Early Childhood Programs
Understanding the frequency mathematics behind whistles and similar instruments directly informs how we design music enrichment experiences for young children. When we recognize that specific dimensions produce specific frequencies, we can intentionally select or create instruments that serve particular developmental goals. This scientific foundation transforms instrument selection from aesthetic preference into evidence-based educational practice.
For infant programs working with babies from 4-18 months, frequency contrast becomes a tool for auditory development. Presenting two whistles with significantly different frequencies (perhaps one at 500 Hz and another at 1500 Hz) provides clear auditory contrast that even very young infants can perceive. This supports the development of auditory discrimination skills that form the foundation for later language and music learning. The predictable, stable frequencies of well-designed whistles offer clearer learning signals than many electronic toys with complex, multi-frequency sounds that can overwhelm developing auditory systems.
In toddler programs for children aged 18-30 months, like the Groovers music and dance classes, frequency awareness can be embedded in movement activities. High-frequency whistles can signal jumping or reaching movements, while low-frequency instruments cue crouching or marching. This creates a somatic (body-based) connection between pitch and physical experience, making abstract frequency concepts concrete and meaningful. The mathematical precision underlying these instruments ensures consistency that helps toddlers form reliable associations.
For preschool-age children (30-47 months), frequency relationships can be introduced through comparative listening and simple pattern work. A set of whistles producing notes from a pentatonic scale (which naturally sounds harmonious regardless of combination) allows children to explore pitch relationships through play. While they won’t understand the mathematical ratios creating these relationships, their brains are processing the frequency patterns, building neural frameworks for later formal music learning. Programs like SMART-START Chinese can integrate these instruments alongside language learning, supporting the documented connection between musical pitch perception and tonal language acquisition.
The sensory integration benefits of working with whistles and similar instruments extend beyond purely auditory learning. The tactile experience of holding an instrument, the proprioceptive feedback from blowing air with controlled force, and the immediate auditory result create a multi-sensory learning loop. This integration supports children who learn kinesthetically, addressing multiple intelligences simultaneously as emphasized in developmentally-focused curricula.
Creating Age-Appropriate Music Learning Tools
Armed with knowledge of frequency mathematics and whistle design principles, educators can make informed decisions about creating or selecting instruments for specific age groups and learning objectives. The safety, durability, and acoustic properties of these tools all matter when working with young children whose developing systems are both remarkably receptive and potentially vulnerable to inappropriate stimuli.
Safety considerations should guide every design decision. For children under 36 months, any whistle or instrument must be large enough to prevent choking hazards, typically requiring minimum dimensions of 45mm in at least one direction. Materials must be non-toxic, and for 3D-printed items, this means using verified food-safe filaments and post-processing techniques that don’t introduce harmful substances. Edges should be smooth, and any small parts must be securely attached. These safety requirements sometimes constrain acoustic design, but child safety always takes precedence over optimal frequency production.
The frequency range appropriate for young children differs from that of instruments designed for adults. Children’s hearing is actually more sensitive to high frequencies than adults, but extremely high pitches (above 3000 Hz) can be uncomfortable or even distressing. The most pedagogically useful range for whistles and similar instruments falls between 400-2000 Hz, covering approximately two octaves that encompass most melodic content in children’s songs while remaining comfortable for young ears.
Durability matters significantly in early childhood settings where instruments undergo frequent use and occasional mishandling. 3D-printed whistles made from PETG offer better impact resistance than PLA, though PLA’s ease of printing makes it attractive for prototyping. Design features like rounded corners, appropriate wall thickness (2.5-3mm), and lack of thin projecting elements help instruments survive the inevitable drops and collisions of active classrooms. A whistle that breaks easily not only creates safety hazards from sharp fragments but also interrupts learning continuity.
Creating instrument sets with intentional frequency relationships enhances educational value. A pentatonic set (five whistles tuned to a scale without semitones) allows unlimited experimentation that always sounds harmonious, removing the possibility of “wrong” notes and encouraging confident exploration. Alternatively, a set of three whistles tuned to the tonic, dominant, and octave of a key provides the basic harmonic framework of most children’s songs, allowing children to accompany familiar melodies. These mathematical relationships between frequencies create the musical relationships children experience intuitively.
The intersection of STEM and arts learning becomes visible in projects like these. While a young child won’t calculate Helmholtz resonance formulas, the instruments we place in their hands embody these mathematical principles. As educators, understanding the science behind our tools allows us to articulate the developmental benefits of music education in terms that align with contemporary educational priorities. Music isn’t just arts enrichment; it’s applied mathematics, physics, and cognitive science delivered through an engaging, developmentally appropriate medium.
The mathematics of frequency and the physics of acoustic resonance might seem far removed from the joyful chaos of a toddler music class, yet they fundamentally shape the learning experiences we create. A 3D-printed whistle represents more than a simple sound-making toy; it embodies principles that govern all musical sound and provides a tangible entry point into STEM concepts that will serve children throughout their educational journey.
For educators working in early childhood music enrichment, understanding these principles transforms practice from intuitive to intentional. We can select or create instruments with specific acoustic properties that serve particular developmental goals, confident that the mathematical precision of frequency relationships supports consistent, effective learning. The cavity dimensions that determine a whistle’s pitch, the resonance patterns that amplify certain frequencies, and the acoustic principles that make some designs more effective than others all inform evidence-based educational practice.
Whether you choose to undertake a 3D-printing project or simply deepen your understanding of the instruments already in your program, this knowledge enriches your teaching. Every whistle blow, every pitched percussion strike, and every melodic phrase children encounter carries within it these elegant mathematical relationships. By understanding them, we become more effective facilitators of the remarkable learning that occurs when young children engage with the scientifically complex, developmentally perfect medium of music.
Explore Developmentally-Focused Music Programs
Discover how The Music Scientist integrates sound science and developmental milestones to create engaging learning experiences for babies, toddlers, and preschoolers. Our programs combine music, movement, and sensory play to support early cognitive development across multiple intelligences.
Table Of Contents
- What Is an Oscilloscope and Why Does It Matter for Children?
- The Science Behind Sound Waves Your Child Can See
- Best Free Oscilloscope Apps for Parents and Educators
- Age-Appropriate Sound Wave Activities
- How Visualizing Sound Supports Early Development
- Integrating Oscilloscope Activities with Music Education
- Practical Tips for Home and Classroom Use
Have you ever wondered what your child’s laughter looks like? What if you could show them the shape of their singing voice or the pattern of a drum beat? Free oscilloscope apps turn this curiosity into reality, transforming invisible sound waves into colorful visual displays that even young children can explore and understand.
For parents and educators focused on early childhood development, these digital tools offer a remarkable opportunity. They bridge the gap between abstract scientific concepts and concrete visual learning, making them particularly valuable for toddlers and preschoolers who are naturally curious about cause and effect. When a child taps a drum and sees the waves jump on a screen, they’re not just playing—they’re building foundational connections between action, sound, and visual representation.
This hands-on approach aligns perfectly with how young minds learn best: through sensory experiences, immediate feedback, and playful exploration. Whether you’re supporting your child’s learning at home or enriching your early childhood program, oscilloscope apps provide an accessible entry point into the fascinating world of sound, music, and science.
What Is an Oscilloscope and Why Does It Matter for Children?
An oscilloscope is a device that displays sound waves as visual patterns on a screen. Traditionally used in electronics laboratories and professional audio studios, modern smartphone and tablet apps have made this technology accessible to everyone, including families with young children. The concept is beautifully simple: sound creates vibrations in the air, and these vibrations can be captured by a microphone and translated into moving images.
For young learners, this visualization offers something profound. Between the ages of 4 months and 4 years, children are developing their understanding of cause and effect relationships. When they clap their hands and see the resulting spike in the wave pattern, they’re experiencing a direct connection between their action and a visual outcome. This immediate feedback loop supports cognitive development in ways that purely auditory experiences cannot.
The technology also addresses different learning styles simultaneously. Musical learners engage with the sounds themselves, visual-spatial learners focus on the patterns and shapes, and kinesthetic learners explore through creating the sounds with their bodies or instruments. This multi-sensory approach makes oscilloscope apps particularly valuable in developmentally-focused programs that recognize diverse intelligences.
The Science Behind Sound Waves Your Child Can See
Understanding the basics of sound waves doesn’t require advanced physics—even preschoolers can grasp the fundamental concepts when presented visually. Sound travels through the air in waves, much like ripples spreading across a pond when you drop a stone. These waves have specific characteristics that determine how we perceive them: pitch (how high or low a sound is) and amplitude (how loud or soft it sounds).
When you use an oscilloscope app, you’re looking at a graph where time moves horizontally across the screen and the strength of the sound moves vertically. A high-pitched sound, like a whistle, creates waves that are close together with many peaks. A low-pitched sound, like a drum, creates waves that are farther apart with fewer peaks in the same timeframe. Similarly, a loud sound creates tall waves, while a quiet sound creates short waves.
For young children, these visual representations provide concrete examples of abstract concepts. Instead of simply hearing that a whistle is “high” and a drum is “low,” they can see the actual difference in the wave patterns. This visual scaffolding supports early scientific thinking and helps children develop the ability to observe, compare, and categorize—skills that form the foundation for later academic learning.
Key Sound Wave Concepts for Early Learners
- Frequency: How fast the waves move (creates pitch—high or low sounds)
- Amplitude: How tall the waves are (creates volume—loud or soft sounds)
- Waveform: The shape of the wave (different instruments and voices create different shapes)
- Duration: How long the sound lasts (short sounds like claps versus sustained sounds like singing)
Best Free Oscilloscope Apps for Parents and Educators
The market offers numerous free oscilloscope applications suitable for educational use with young children. While professional-grade apps exist with complex features, the best options for early childhood education prioritize simplicity, visual appeal, and ease of use. Here are the most recommended free options that work well in both home and classroom settings.
Recommended Apps for Different Devices
For iOS (iPhone/iPad): Oscilloscope by Patrick Q. Kelly stands out for its clean interface and bright, colorful display. The app responds instantly to sound input, making it ideal for toddlers and preschoolers who need immediate feedback. The visual display is large and easy to see even from a distance, which is helpful during group activities.
For Android: Oscilloscope by Doggo Apps provides similar functionality with a child-friendly interface. It features adjustable sensitivity, allowing you to fine-tune the display based on the room’s background noise level. This is particularly useful in busy classrooms or homes with multiple children.
For computers: Web-based oscilloscope tools like Academo’s Audio Oscilloscope require no installation and work directly in your browser. These are excellent for projected displays in classroom settings or for parents who want to use a larger screen at home.
Features to Look for in Child-Friendly Apps
- Large, clear display: Young children need to see the waves easily without straining
- Bright colors: Vibrant visuals capture attention and make patterns more distinguishable
- Simple controls: Minimal buttons reduce confusion and accidental changes
- Instant response: No lag between sound input and visual display
- No ads or in-app purchases: Maintains focus and safety for young users
Age-Appropriate Sound Wave Activities
The beauty of oscilloscope apps lies in their adaptability across different developmental stages. A well-designed activity can engage an infant’s sensory curiosity while also challenging a preschooler’s emerging analytical skills. The key is matching the complexity of the exploration to your child’s current abilities while providing opportunities for discovery.
For Infants and Young Toddlers (4-18 months)
At this stage, the focus is on sensory exploration and cause-effect relationships. Babies are fascinated by the connection between actions and results, even if they don’t fully understand the mechanism. These activities work particularly well during programs like Tenderfeet, where sensory development takes center stage.
Activity: Shake and See – Hold your device where your child can see the screen clearly. Give them a rattle or shaker toy and demonstrate how shaking creates waves on the display. Let them experiment with different shaking speeds and intensities. Even very young infants will track the movement on the screen, building visual processing skills while experiencing the joy of making something happen.
Activity: Voice Patterns – Make different sounds with your voice (humming, clicking your tongue, singing high and low notes) while your baby watches the screen. This combines language development with visual tracking. The varied patterns help infants begin to distinguish between different types of sounds, supporting early auditory discrimination.
For Active Toddlers (18-30 months)
Toddlers bring energy and curiosity to everything they do. They’re ready for activities that involve more movement and offer opportunities to make predictions, even simple ones. These explorations complement programs like Happyfeet, which emphasize movement and music together.
Activity: Instrument Exploration – Provide simple instruments (drums, bells, xylophones) and let your toddler discover how each one creates different wave patterns. Encourage them to play loud and soft, fast and slow. Use simple language: “Look how big the waves are when you bang the drum hard!” or “The bell makes the waves wiggle quickly!”
Activity: Body Sounds – Help your child explore sounds they can make with their body: clapping, stomping, snapping fingers, clicking tongue, or humming. This activity builds body awareness while demonstrating that we’re all capable of creating diverse sounds. It’s particularly effective when children can take turns and compare their patterns with siblings or classmates.
For Preschoolers (3-4 years)
Preschoolers are developing analytical thinking and can begin to categorize and compare. They’re ready to observe patterns more carefully and make connections between what they see and what they hear. These activities align beautifully with programs like Groovers and Scouts, which encourage scientific thinking through musical exploration.
Activity: Wave Matching Game – Create simple cards with drawings of different wave patterns (big waves, small waves, close-together waves, far-apart waves). Ask your child to make sounds that match each pattern. This reverse-engineering approach challenges them to use what they’ve learned about sound properties to recreate specific visual results.
Activity: High and Low Hunt – Go on a sound hunt around your home or classroom. Find objects that make high sounds (bells, whistles, keys jingling) and low sounds (drums, wooden blocks, your voice). Use the oscilloscope to “prove” which category each sound belongs to by observing the spacing of the waves. This activity builds classification skills while introducing the scientific method of testing predictions.
How Visualizing Sound Supports Early Development
The benefits of oscilloscope activities extend far beyond learning about sound waves. These explorations support multiple areas of development simultaneously, making them remarkably efficient learning tools for the early childhood years. Understanding these benefits helps parents and educators maximize the value of each activity.
Cognitive Development
When children observe cause-effect relationships through oscilloscope activities, they’re building foundational logical thinking skills. They learn that specific actions produce predictable results: hitting a drum harder always creates bigger waves, singing high notes always creates closely-spaced waves. This predictability helps young minds construct mental models of how the world works, which is essential for later problem-solving abilities.
The activities also promote pattern recognition, a crucial pre-math skill. Children begin to notice that certain sounds create repeating patterns, while others create irregular patterns. They observe similarities and differences between wave shapes, developing the comparison skills that will later support everything from reading comprehension to mathematical thinking.
Language and Literacy Development
Oscilloscope activities provide rich opportunities for vocabulary development. Children learn descriptive words like “loud,” “soft,” “high,” “low,” “fast,” and “slow” in a context where these words have clear visual representations. This concrete connection between word and meaning strengthens language acquisition in ways that abstract instruction cannot achieve.
Additionally, seeing the visual representation of their own voices helps children develop phonological awareness—the understanding that speech is made up of sounds. When they observe how different vowel sounds or consonants create different wave patterns, they’re building the sound discrimination skills that underpin reading development. Programs like SMART-START English leverage these connections to prepare children for literacy success.
Fine and Gross Motor Skills
Creating different sounds requires varied motor control. Tapping gently versus banging forcefully, shaking slowly versus shaking quickly, maintaining a steady beat versus changing rhythms—all of these involve different levels of motor planning and execution. As children experiment with creating specific wave patterns, they’re simultaneously refining their motor control in purposeful, engaging ways.
Integrating Oscilloscope Activities with Music Education
Music education and oscilloscope exploration form a natural partnership. When children understand that music is made of organized sound waves with specific characteristics, they develop a deeper appreciation for musical elements like melody, harmony, and rhythm. This scientific lens enhances rather than diminishes the emotional and creative aspects of music.
Consider incorporating oscilloscope observations into existing music activities. When learning a new song, take a moment to visualize what the melody looks like. Do the high notes create different patterns than the low notes? What happens to the waves when everyone sings together versus when one child sings alone? These brief investigations add a layer of understanding without interrupting the flow of musical play.
Connecting Sound Visualization to Musical Concepts
Pitch Exploration: Use the oscilloscope to demonstrate ascending and descending scales. Children can see the waves getting closer together as they sing up the scale and farther apart as they sing down. This visual component helps them internalize pitch relationships, supporting in-tune singing and pitch matching abilities.
Dynamics (Volume): Practice singing or playing instruments at different dynamic levels (piano to forte, or soft to loud) while observing how the wave amplitude changes. This makes the abstract musical notation of dynamics concrete and observable, helping young musicians develop better volume control.
Timbre (Sound Quality): Compare how different instruments playing the same note create different wave shapes. A violin playing middle C looks different from a flute playing middle C, even though they’re the same pitch and volume. This introduces the concept that sound has qualities beyond just pitch and loudness, deepening musical understanding.
Practical Tips for Home and Classroom Use
Successfully incorporating oscilloscope apps into your learning environment requires some thoughtful planning. These practical strategies will help you avoid common pitfalls and maximize engagement, whether you’re working with your own child at home or facilitating activities with a group of young learners.
Setting Up Your Space
Minimize background noise: Oscilloscopes respond to all sounds in the environment, so choose a relatively quiet space for your activities. If you’re in a busy household or classroom, consider using headphones connected to instruments or positioning your device away from high-traffic areas.
Screen positioning matters: Place your device where all children can easily see the display. For group activities, consider connecting your device to a larger screen or projector. The bigger the display, the more engaging the visual feedback becomes for young children.
Have instruments ready: Gather a variety of sound-making tools before you begin. Include different categories: percussion instruments, melodic instruments, everyday objects that make sounds (wooden spoons, keys, paper to crinkle), and don’t forget the most versatile instrument of all—the human voice.
Facilitating Meaningful Exploration
- 1. Start with free exploration – Allow children time to simply experiment without specific objectives. Let them discover on their own that different sounds create different patterns. This open-ended exploration builds ownership and curiosity.
- 2. Use guiding questions – Rather than telling children what they should notice, ask questions that direct their attention: “What happens to the waves when you sing really high?” or “Can you make waves that reach the top of the screen?” Questions encourage active thinking rather than passive observation.
- 3. Connect to their interests – If a child loves dinosaurs, explore what a dinosaur roar might look like. If they’re fascinated by transportation, investigate train whistles versus car horns. These personal connections increase engagement and make the learning more memorable.
- 4. Keep sessions short – Young children’s attention spans are limited. A focused 10-15 minute oscilloscope activity often provides more learning value than a longer, less engaged session. You can always return to the activity another day with fresh curiosity.
- 5. Document discoveries – Take photos or videos of interesting wave patterns children create. These can become part of a documentation panel, learning portfolio, or simply fun memories to revisit. Seeing their past discoveries helps children recognize their own learning progress.
Safety and Device Management
- Use a protective case: Young children can be enthusiastic in their explorations, so protect your device from drops and spills
- Set volume limits: Ensure sounds won’t become uncomfortably loud, which could damage hearing or frighten sensitive children
- Supervise closely: Devices should always be used under adult supervision with young children
- Keep it special: Limit general device access while making oscilloscope activities a special, purposeful use of technology
Extending the Learning Beyond the Screen
The most powerful learning happens when digital exploration connects to physical, hands-on experiences. After using the oscilloscope app, extend the concepts through complementary activities. Create wave patterns with yarn or ribbon, moving them quickly for high sounds and slowly for low sounds. Draw wave pictures with crayons, using your body to make big arm movements for loud sounds and small movements for soft sounds.
These multi-modal experiences reinforce the concepts through different sensory channels, which is particularly important for young learners who benefit from encountering information in varied formats. The oscilloscope provides the concrete visual model that makes the abstract concept of sound waves understandable, and then physical activities help children internalize and remember what they’ve learned.
Free oscilloscope apps transform invisible sound into visible learning opportunities, opening a window into the fascinating physics of sound for even the youngest children. By making abstract concepts concrete and providing immediate visual feedback, these tools support cognitive development, language acquisition, musical understanding, and scientific thinking in ways that align perfectly with how young minds naturally learn.
Whether you’re a parent supporting your child’s curiosity at home or an educator enriching your early childhood program, oscilloscope activities offer versatile, engaging, and developmentally appropriate explorations. They require minimal setup, no special equipment beyond a device you likely already own, and can be adapted to suit any child’s interests and abilities.
The beauty of this technology lies not in replacing traditional music and movement experiences, but in enhancing them with an additional layer of understanding. When children sing, dance, play instruments, and create music while also seeing the visual representation of those sounds, they’re building richer, more connected neural pathways that support lifelong learning and creativity.
Discover How Music and Science Come Together
At The Music Scientist, we believe in nurturing young minds through the powerful combination of music, movement, and scientific exploration. Our developmentally-focused programs integrate sensory experiences with age-appropriate learning, helping children build confidence, cognitive skills, and a lifelong love of discovery.
From infant sensory classes to preschool readiness programs in both English and Chinese, we create engaging environments where children explore sound, rhythm, and music through hands-on activities that support multiple intelligences and developmental milestones.
Contact us today to learn more about how our programs can support your child’s unique learning journey.